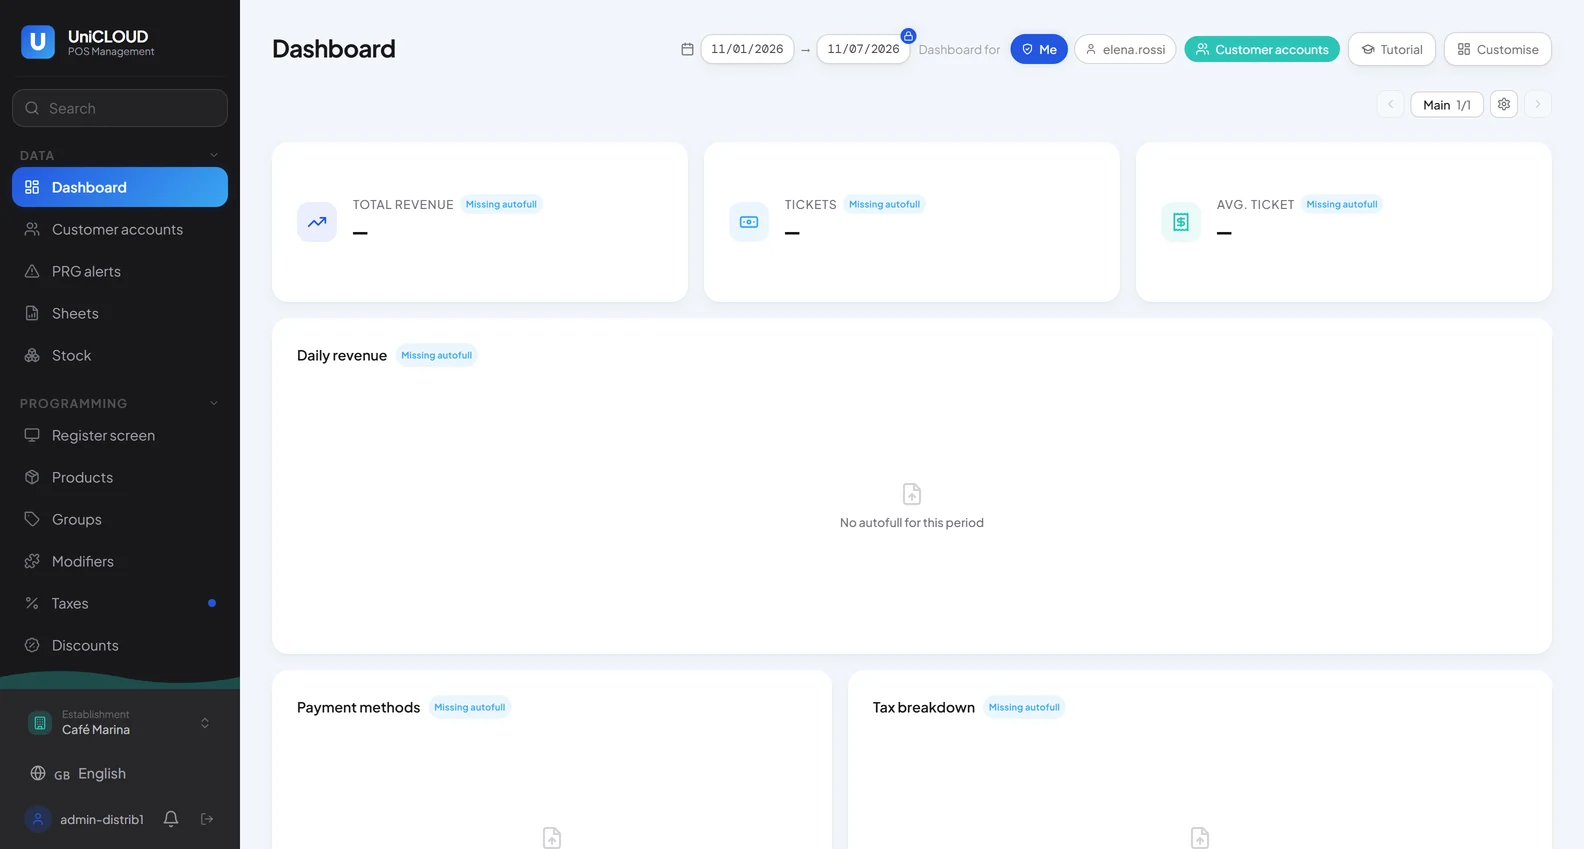
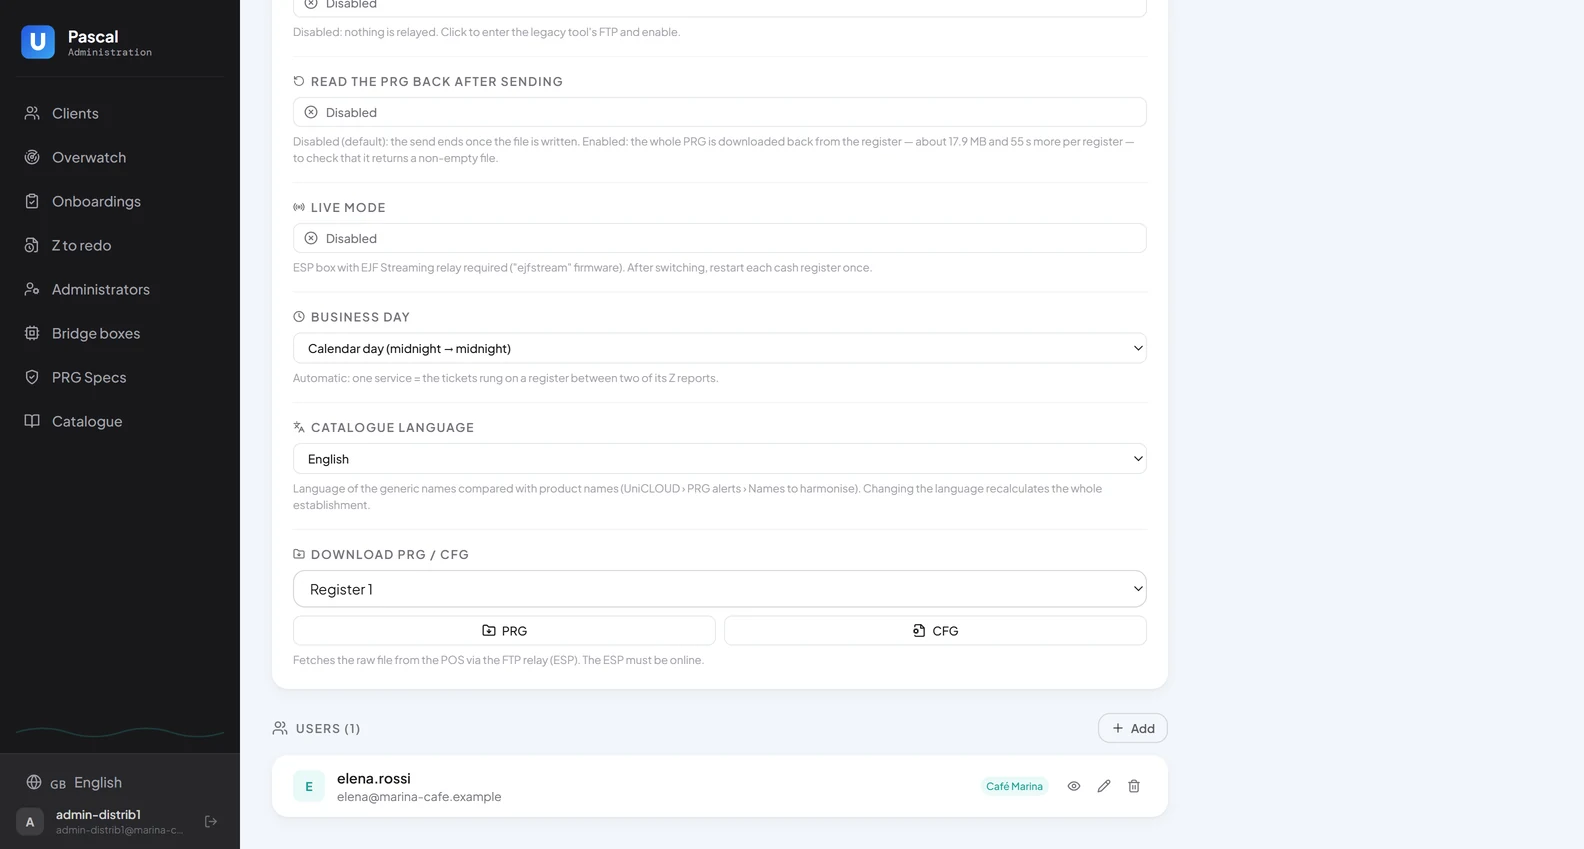
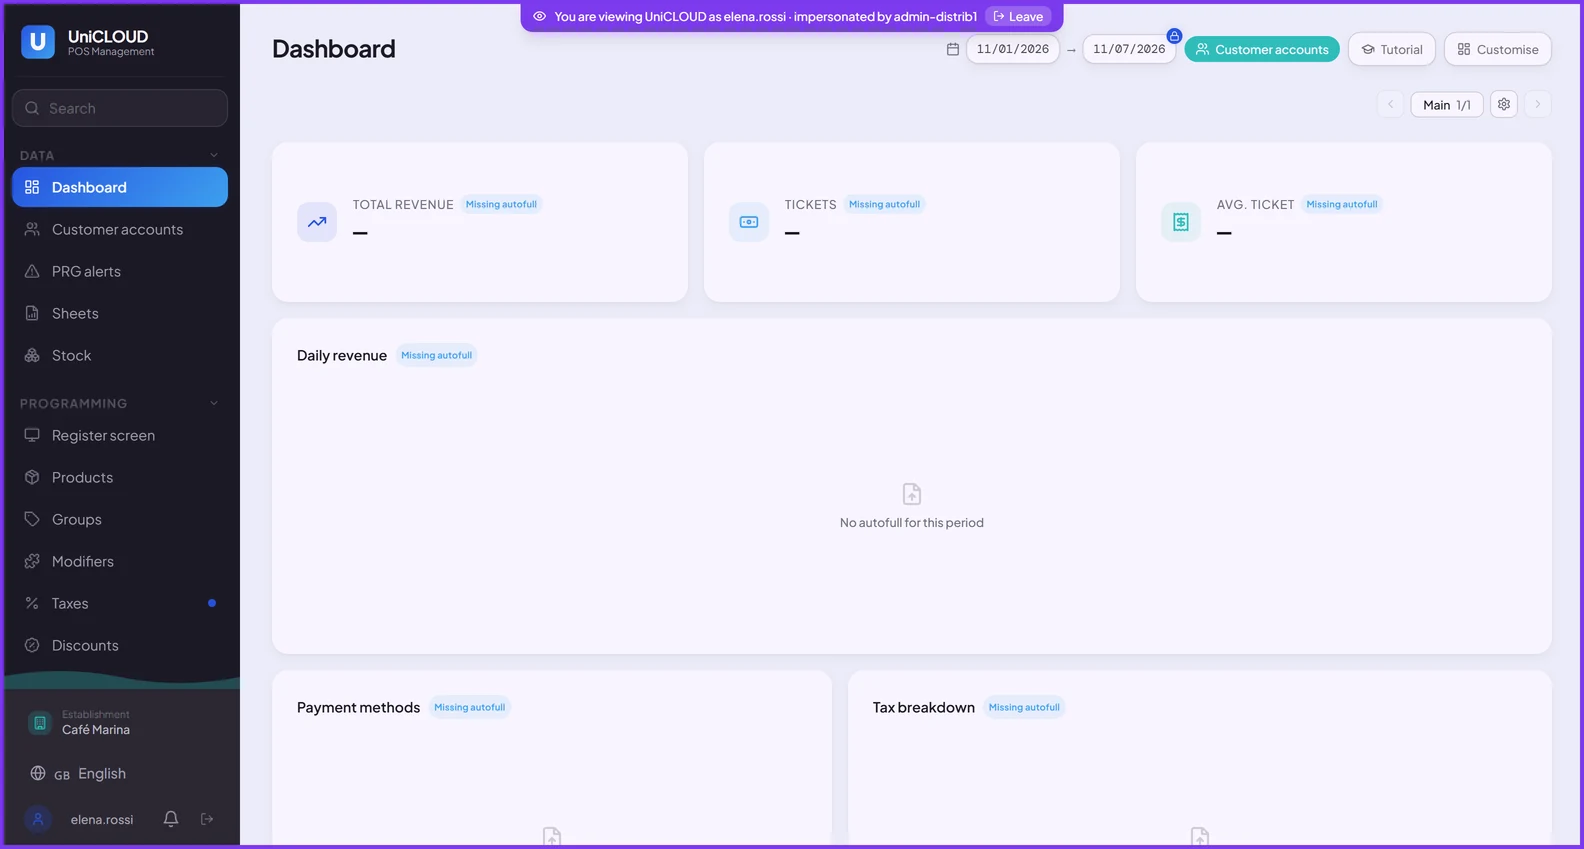
The administration console of your distributor. Everything here can be done before the visit.
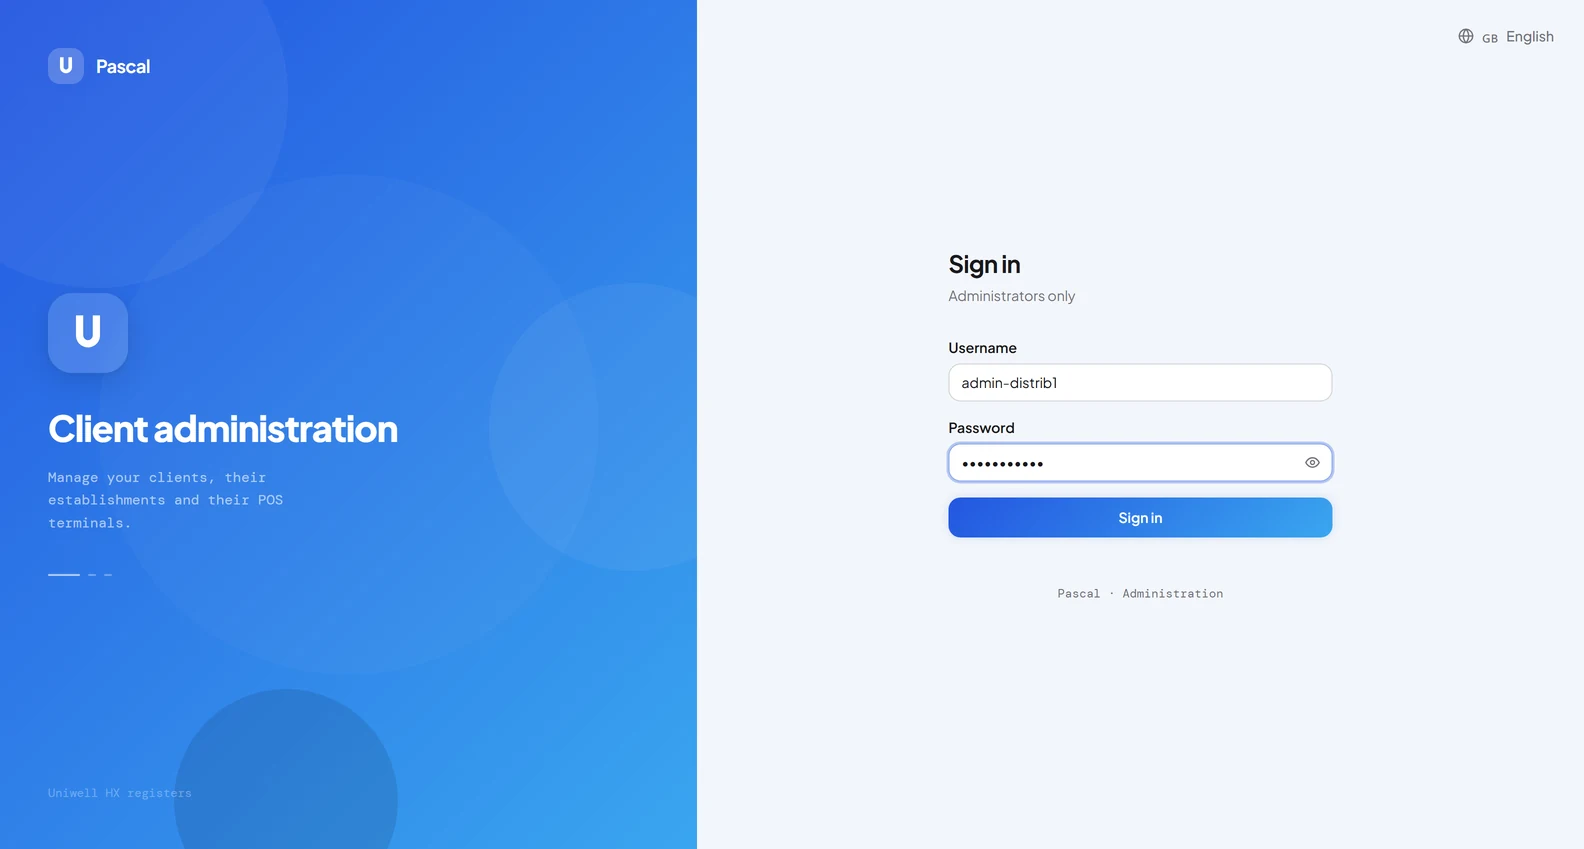
A1Sign in to the dealer platform
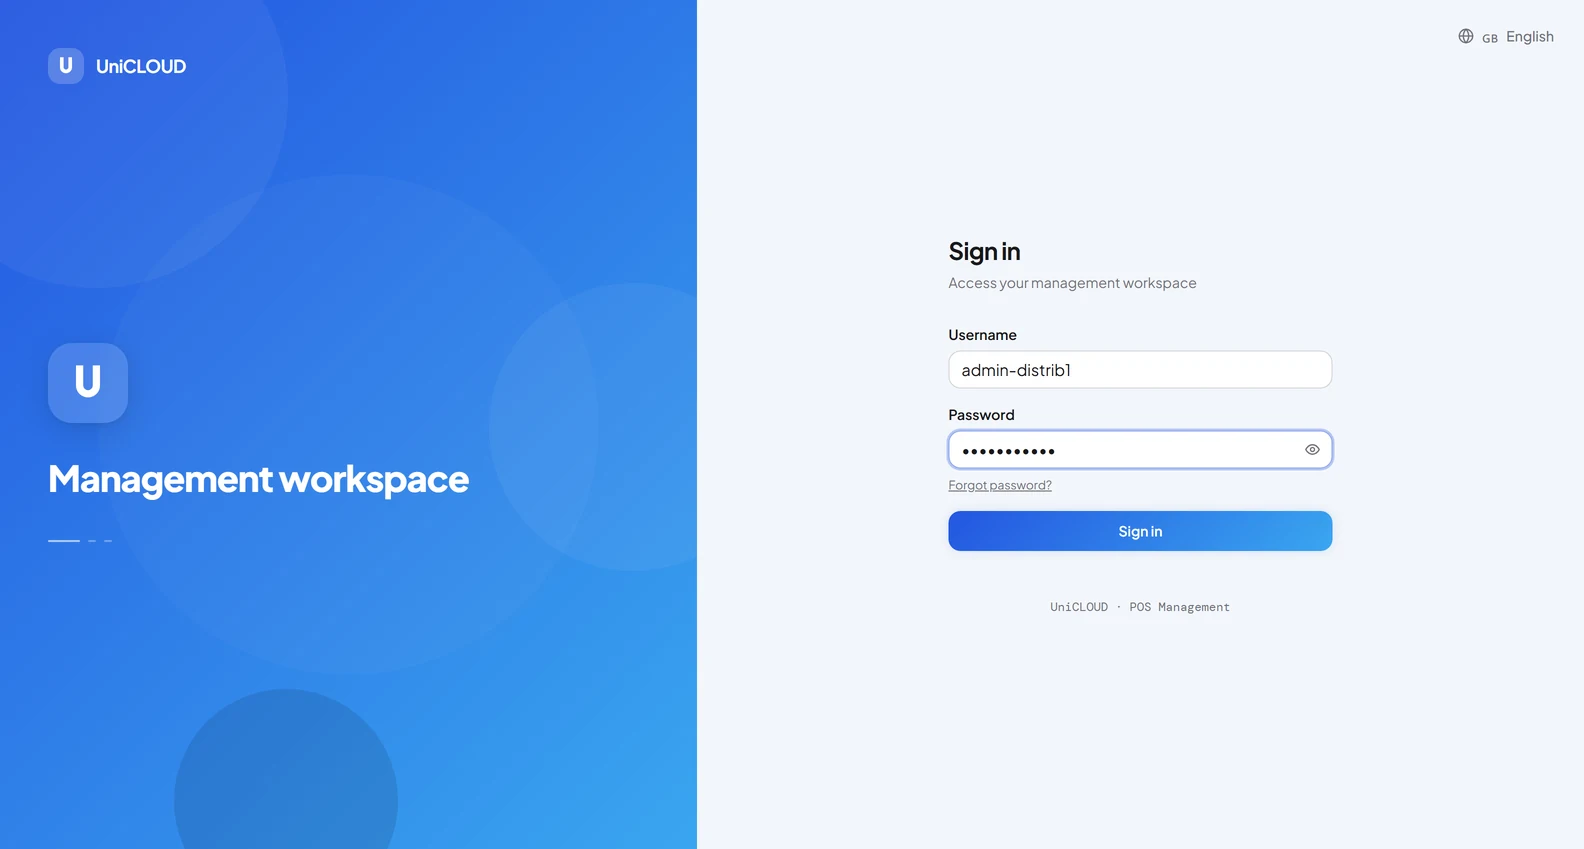
Open your distributor’s console address.
Type your administrator username (not an email) and your password.
Press «Sign in».
NoteThe language switch is at the top right.
Screen · The console sign-in page
A2Create a client
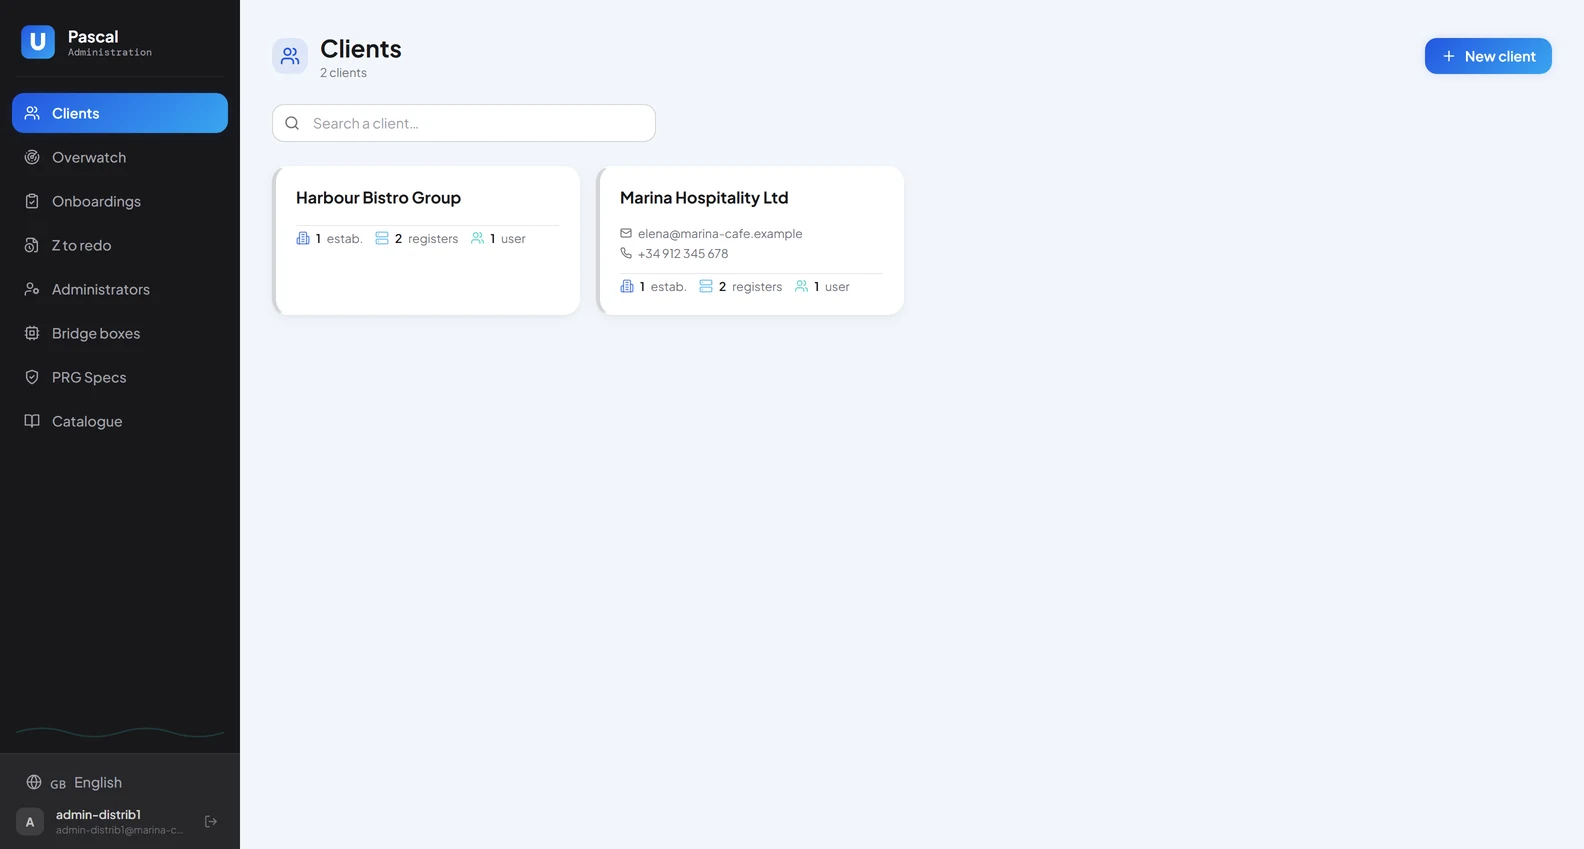
Open «Clients».
If the client already exists, open its record from the list and go to A3. Otherwise press «New client».
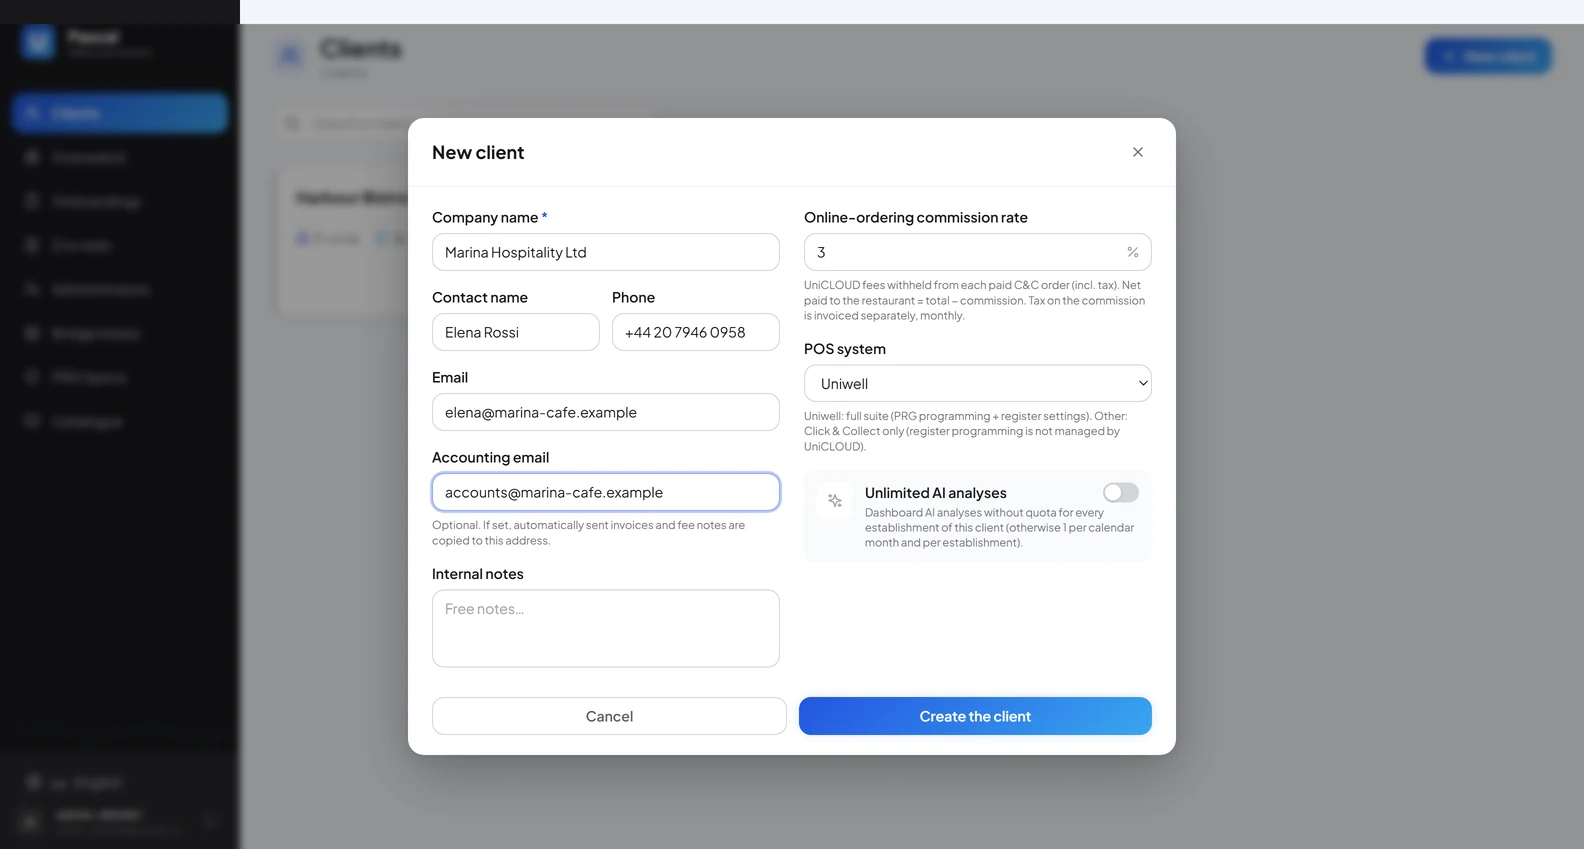
Fill in «Company name», the only required field. «Accounting email» is optional: it receives a copy of the invoices and fee notes sent automatically.
Keep «POS system» on Uniwell: it unlocks the register programming.
Press «Create the client».
NoteThe client is the company: one client can own several establishments.
Screen · The Clients pageScreen · The new client form
A3Add an establishment to a client
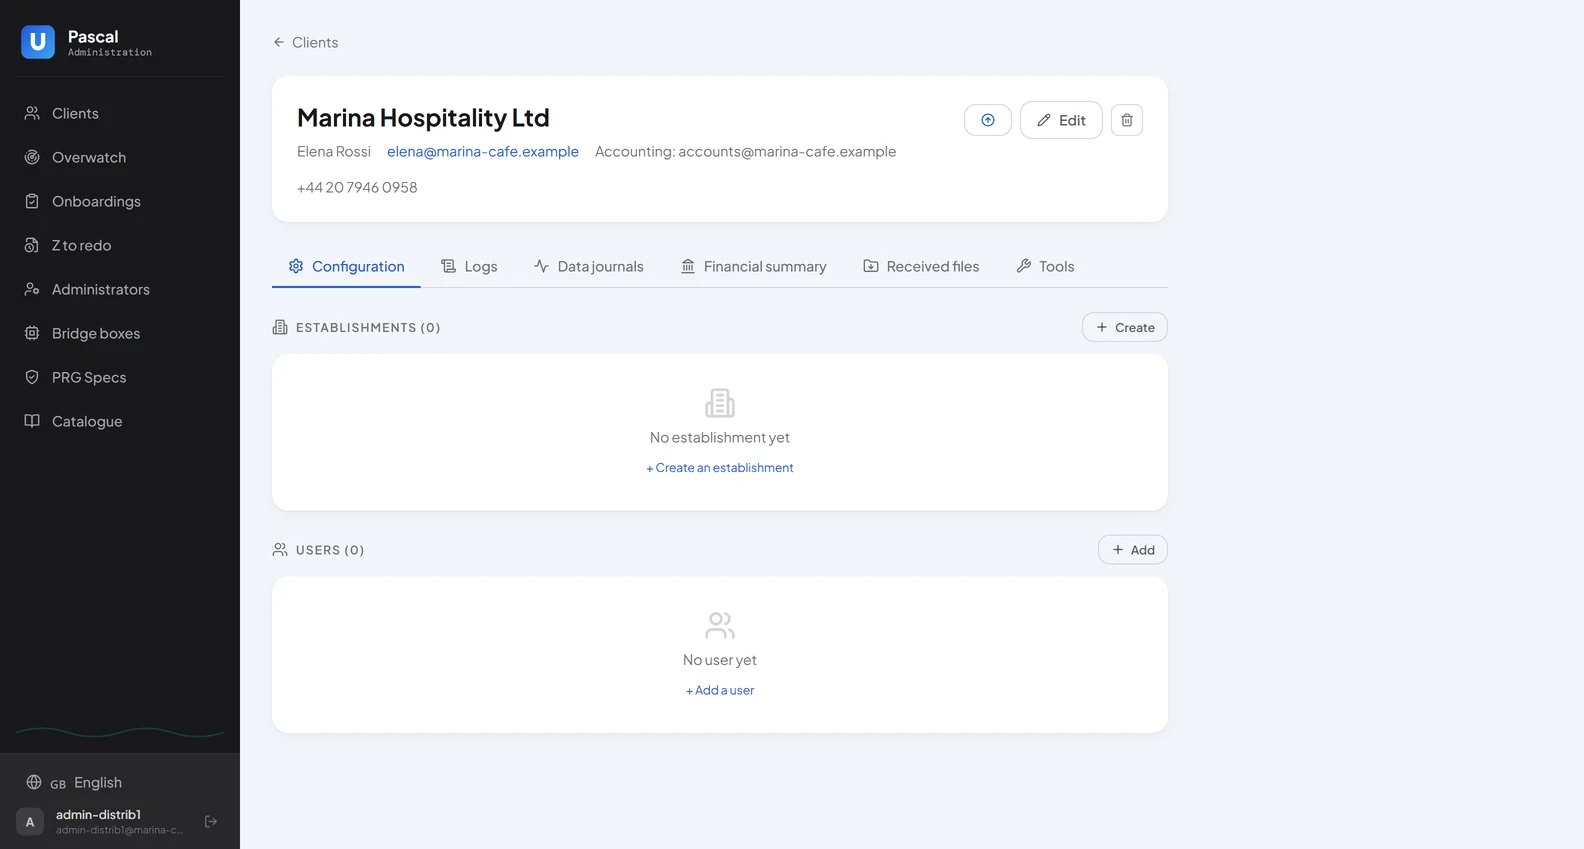
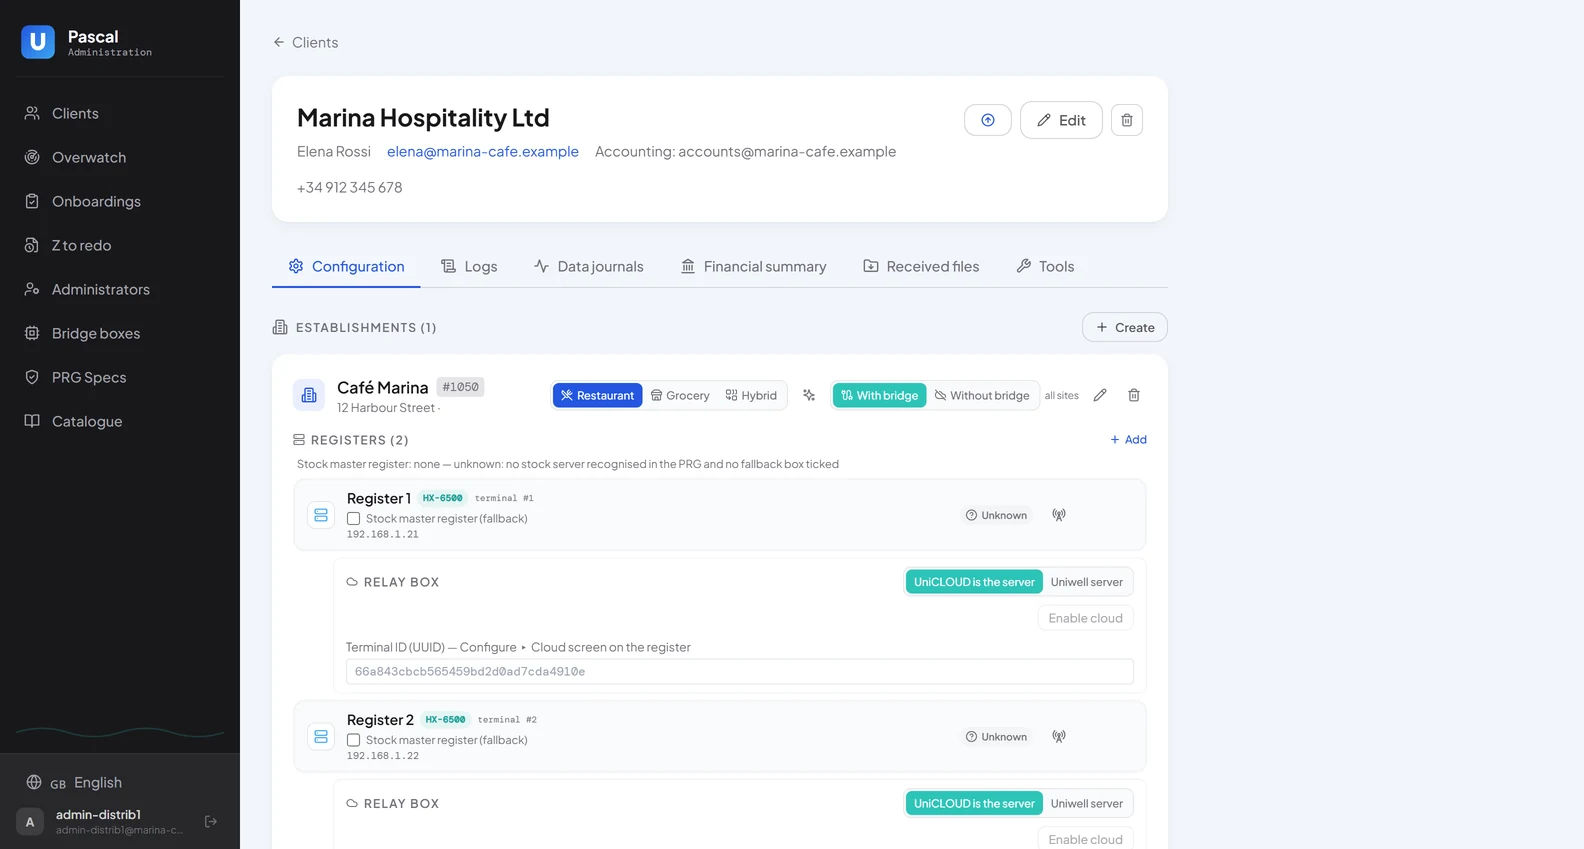
Open the client record: it lists its establishments and users.
Press «Create» in the Establishments section.
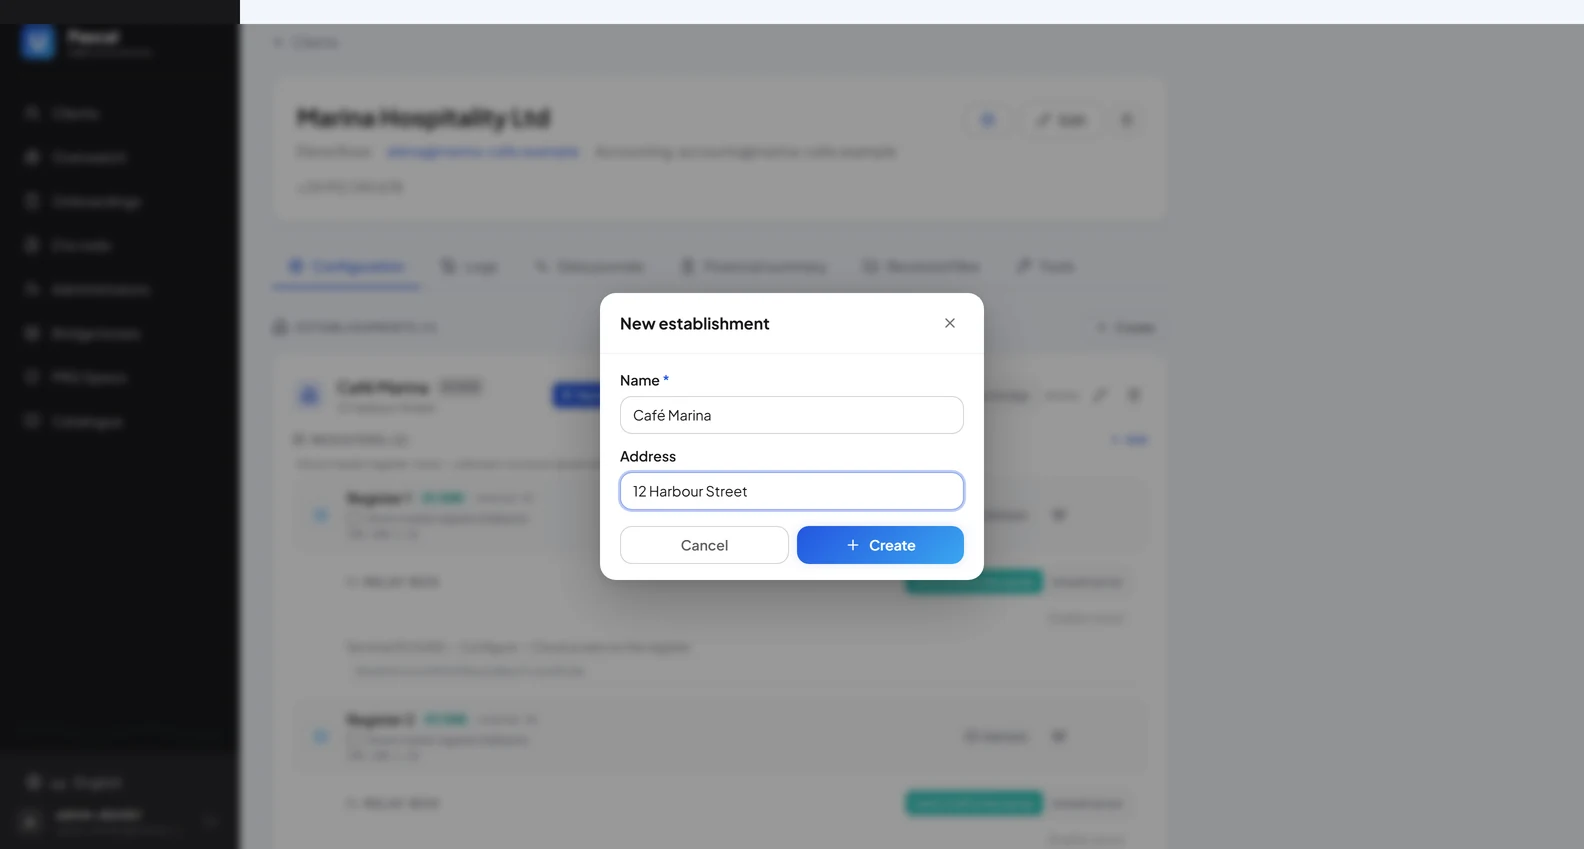
Type the name the merchant uses and, if you have it, the address.
Press «Create».
On the establishment card, check the business type: Restaurant, Grocery or Hybrid. Leave «With bridge» as it is: the onboarding sets it on site. «Attach» is only for attaching a box outside the onboarding.
NoteOne establishment per shop or restaurant.
Screen · The client recordScreen · The new establishment dialogScreen · The establishment card
A4Create credentials for the client
In the Users section of the client record, press «Add».
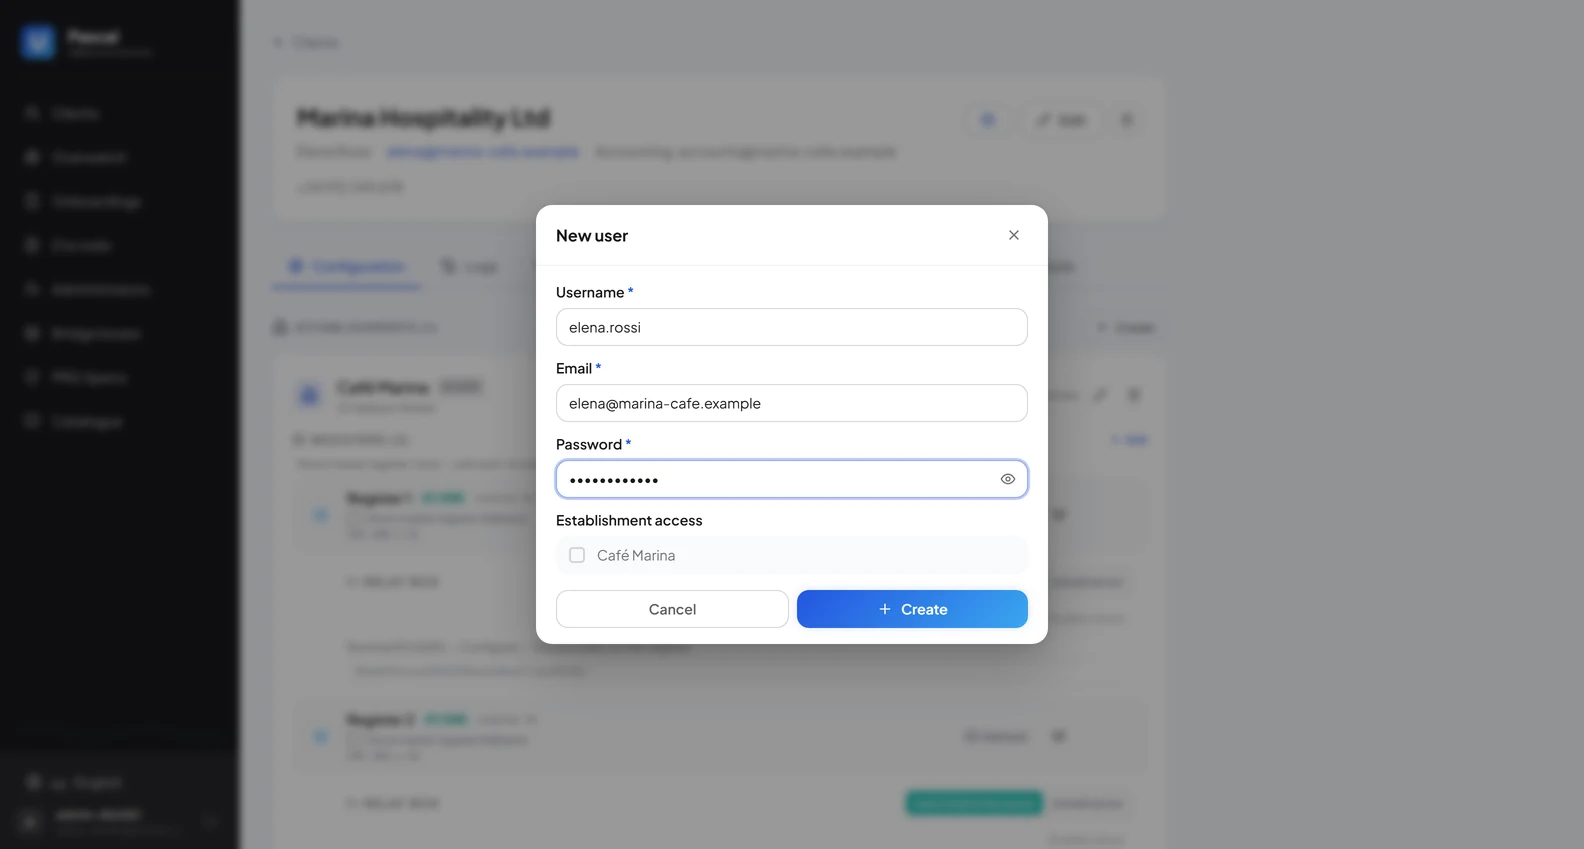
Type a username, an email and a password. The merchant signs in with the username, not the email.
Press «Create».
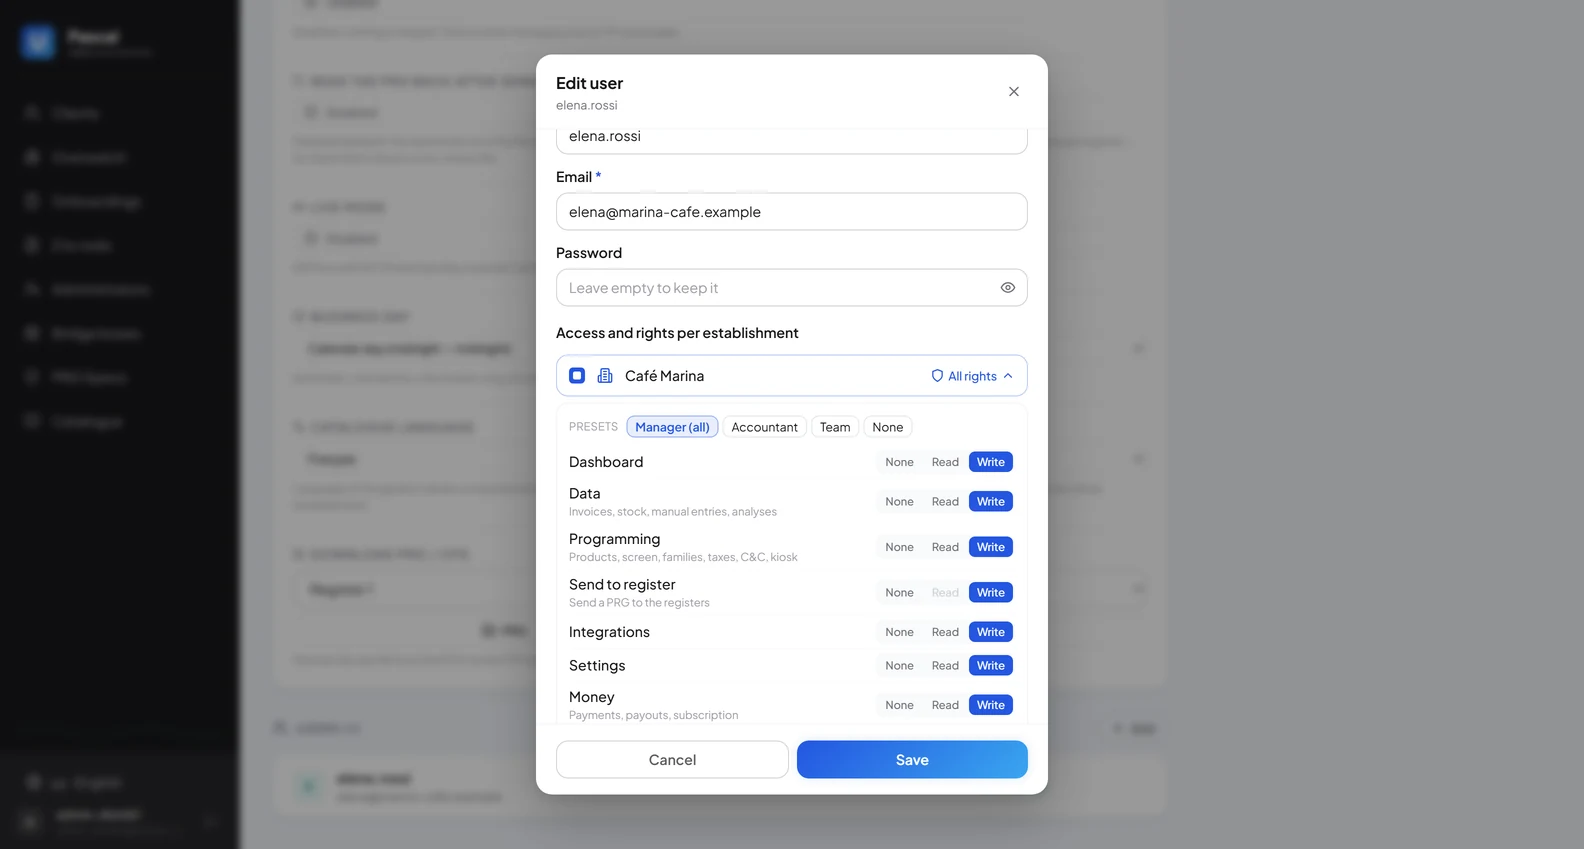
Edit the user and tick the establishment.
Pick a preset: «Manager (all)» for the owner, «Accountant» or «Team» for the others.
Press «Save».
NoteRights are per establishment and per area (Data, Programming, Send to register, Settings...). They can be refined later.
Screen · The new user dialogScreen · The rights editor
A5Put a bridge box into service
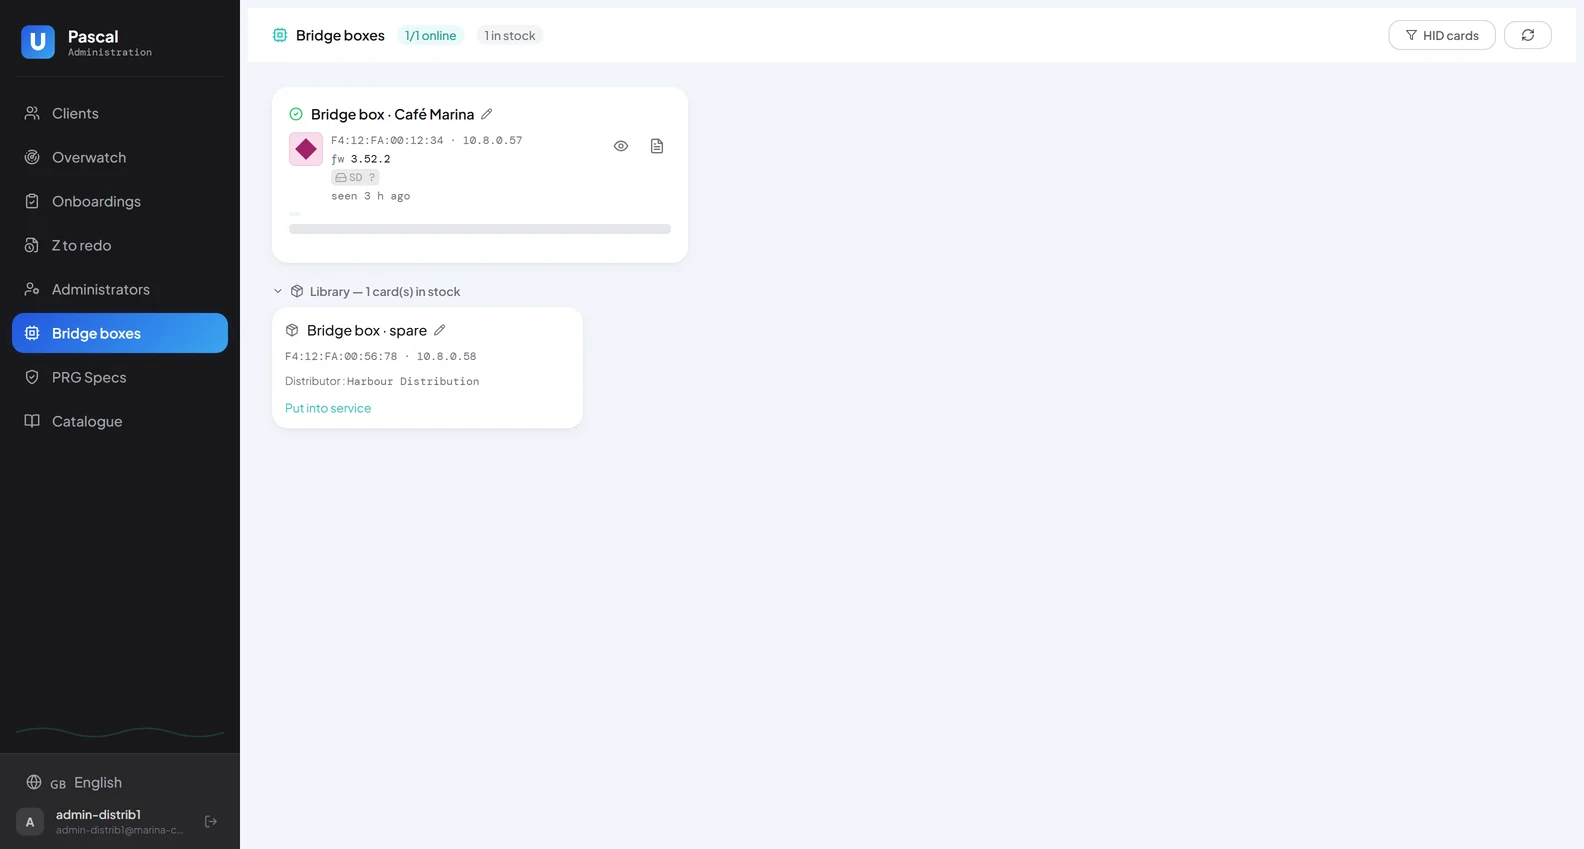
Open «Bridge boxes».
Press «Put into service» on a box of the «Library»: it becomes available to the onboarding.
NoteBoxes are provisioned by UniCLOUD for your distributor. Once attached to an establishment, the box shows online with its firmware.
Screen · The Bridge boxes page: one box in service, one in the library
UniCLOUD, the platform your clients will use. The onboarding is run from here, with your administrator credentials.
B1Sign in with your administrator credentials
Open your distributor’s UniCLOUD address.
Type your administrator username and your password, then press «Sign in». The onboarding is reserved for administrators.
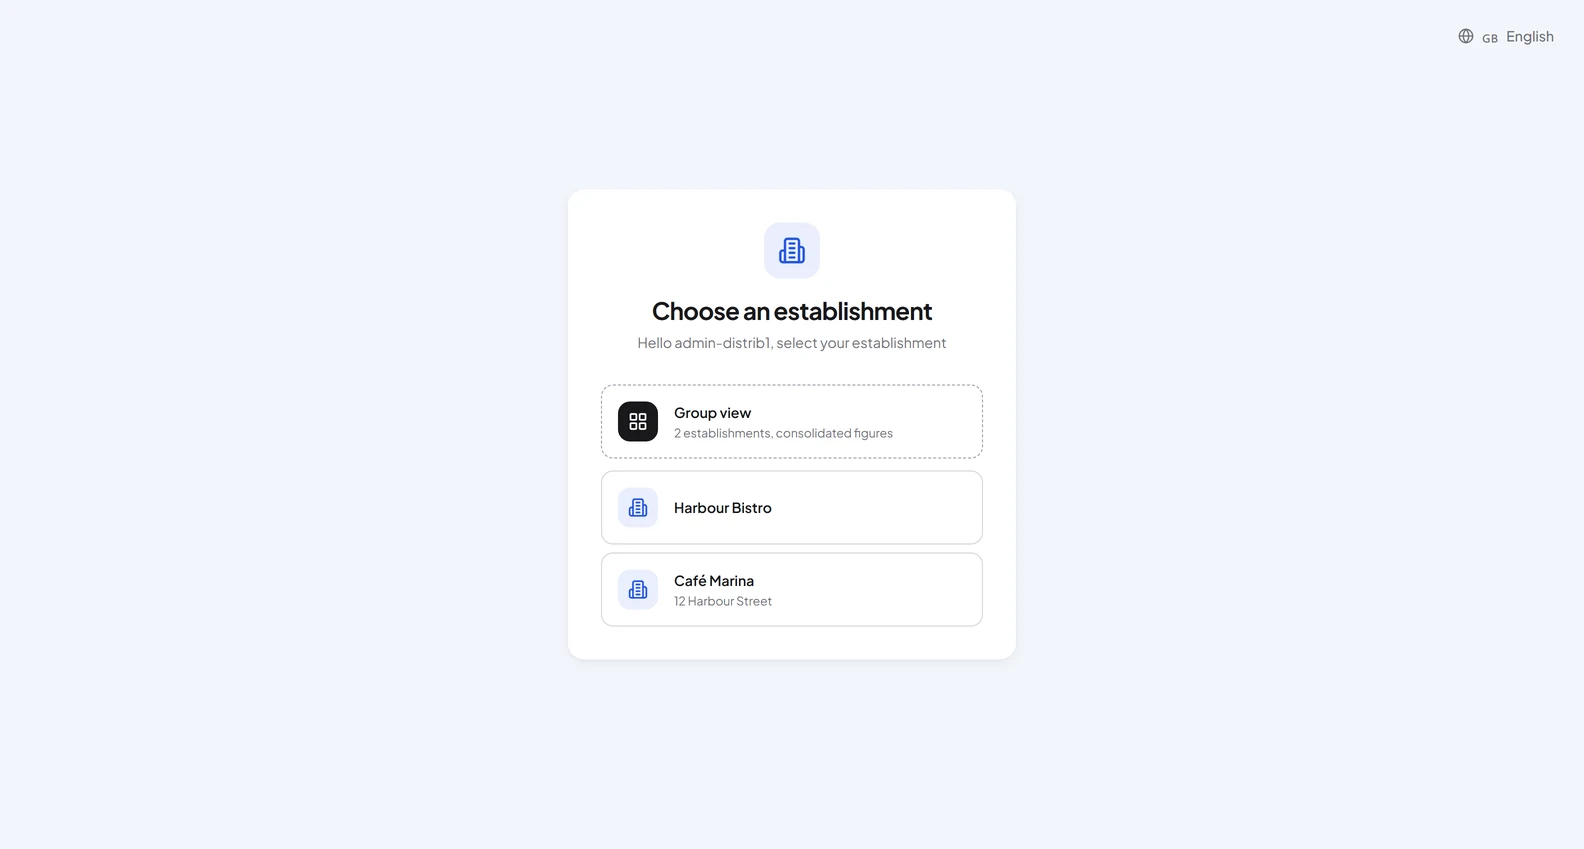
Choose the establishment you created in the console.
Screen · The UniCLOUD sign-in pageScreen · The establishment picker
B2Open «Register screen» and choose the installation mode
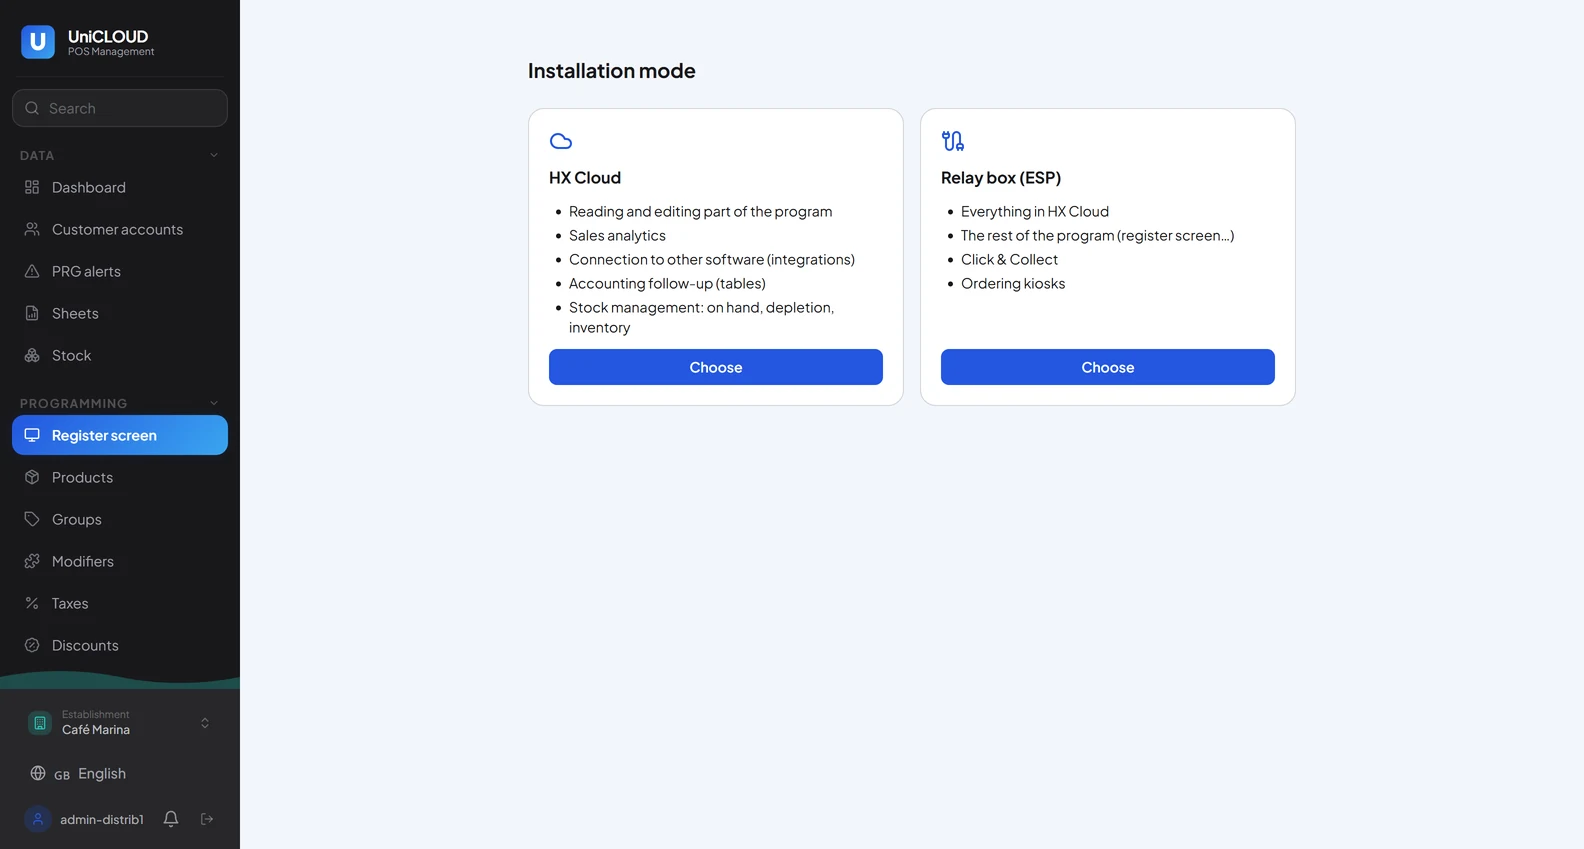
Under Programming, open «Register screen». The onboarding opens there as long as the establishment has no program yet.
Press «Choose» under «Relay box (ESP)»: that is the bridge box, which the screen also calls «Relay card». «HX Cloud» is the variant without a box (section F).
Follow the steps on screen (section C).
NoteIf the onboarding does not open: the account is not an administrator, or the establishment already has a program.
Bridge box path. The screen numbers the steps itself; here is what you do at each one.
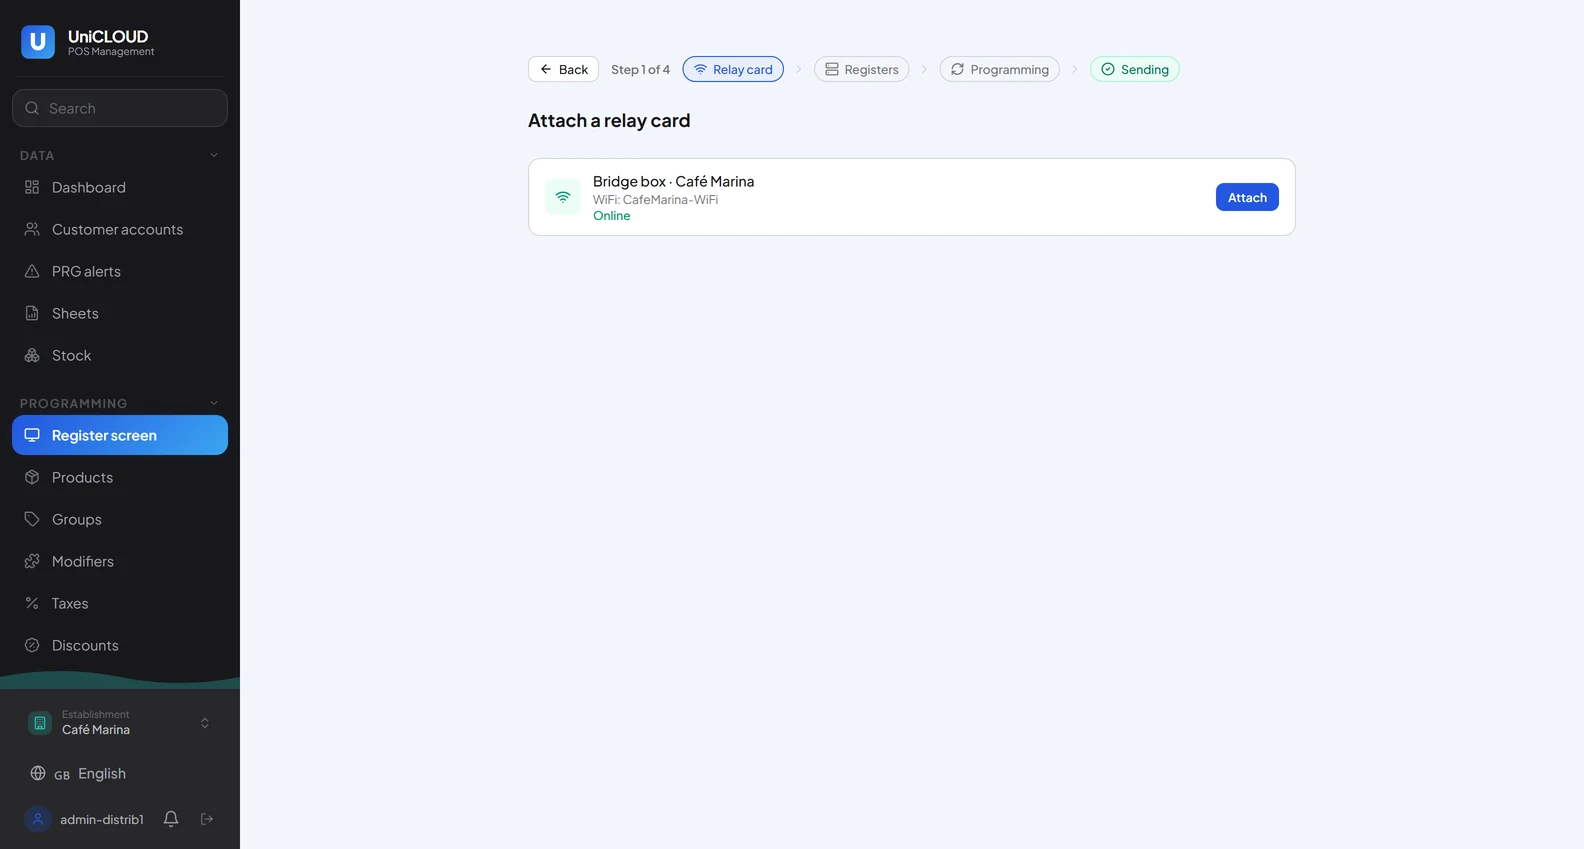
C1Attach the bridge box
Plug in the box: power and the shop’s network.
Wait until it appears in the list, online, with its Wi-Fi name.
Check it is the box you put into service for this establishment, then press «Attach».
Note«No relay card found»: have a box put into service for your distributor (A5). «Service unreachable»: try again in a moment.
Screen · Attach the bridge box
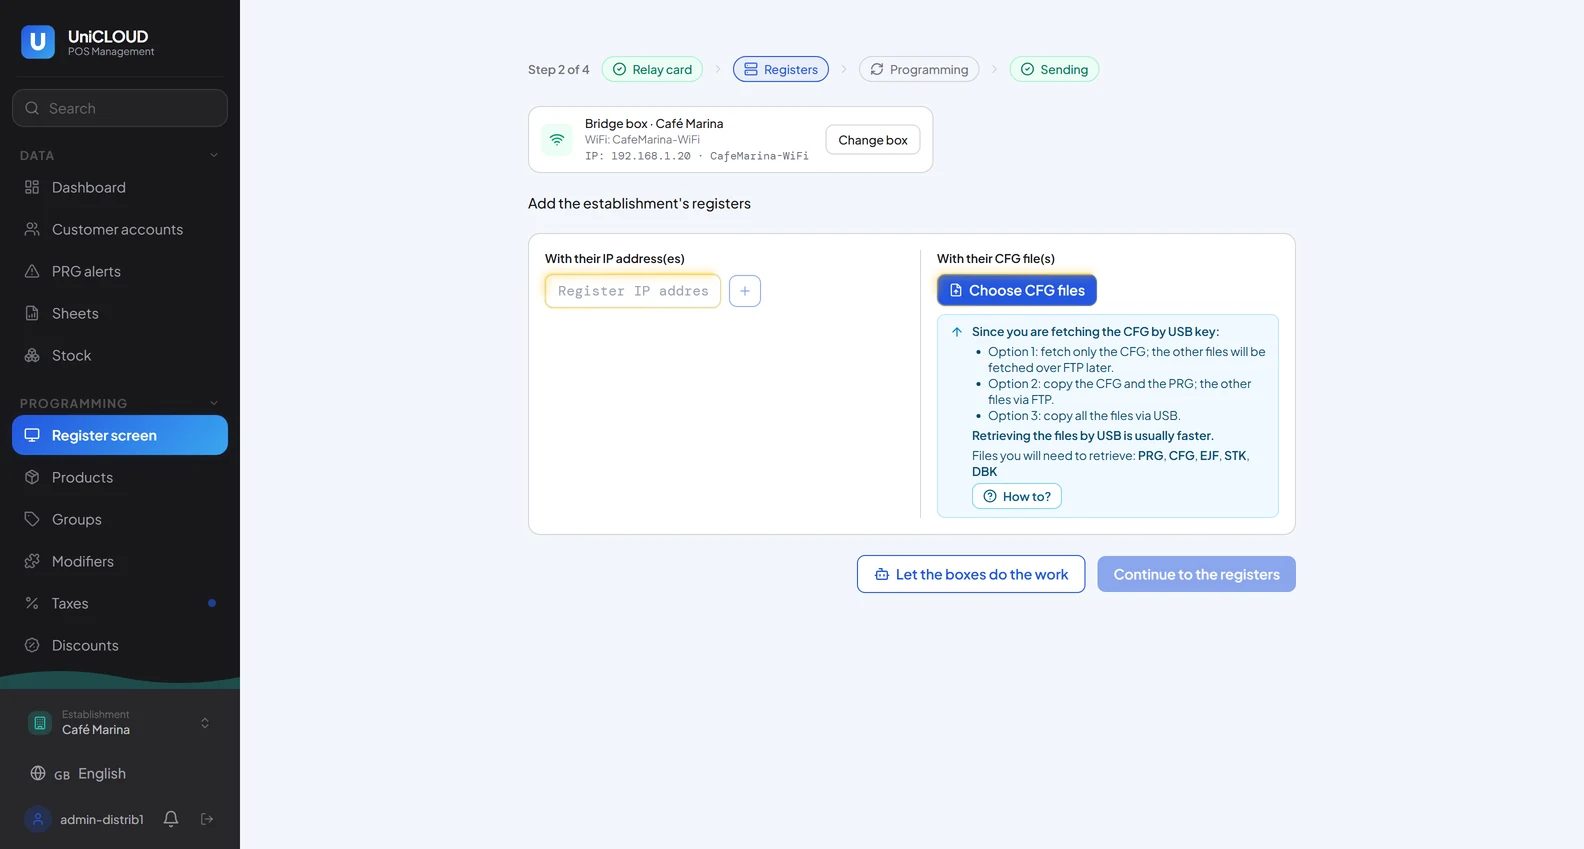
C2Declare the registers
Check the box card: name, Wi-Fi, IP address.
For each register, type its IP address. Or press «Choose CFG files» to upload its CFG file from a USB key (several at once).
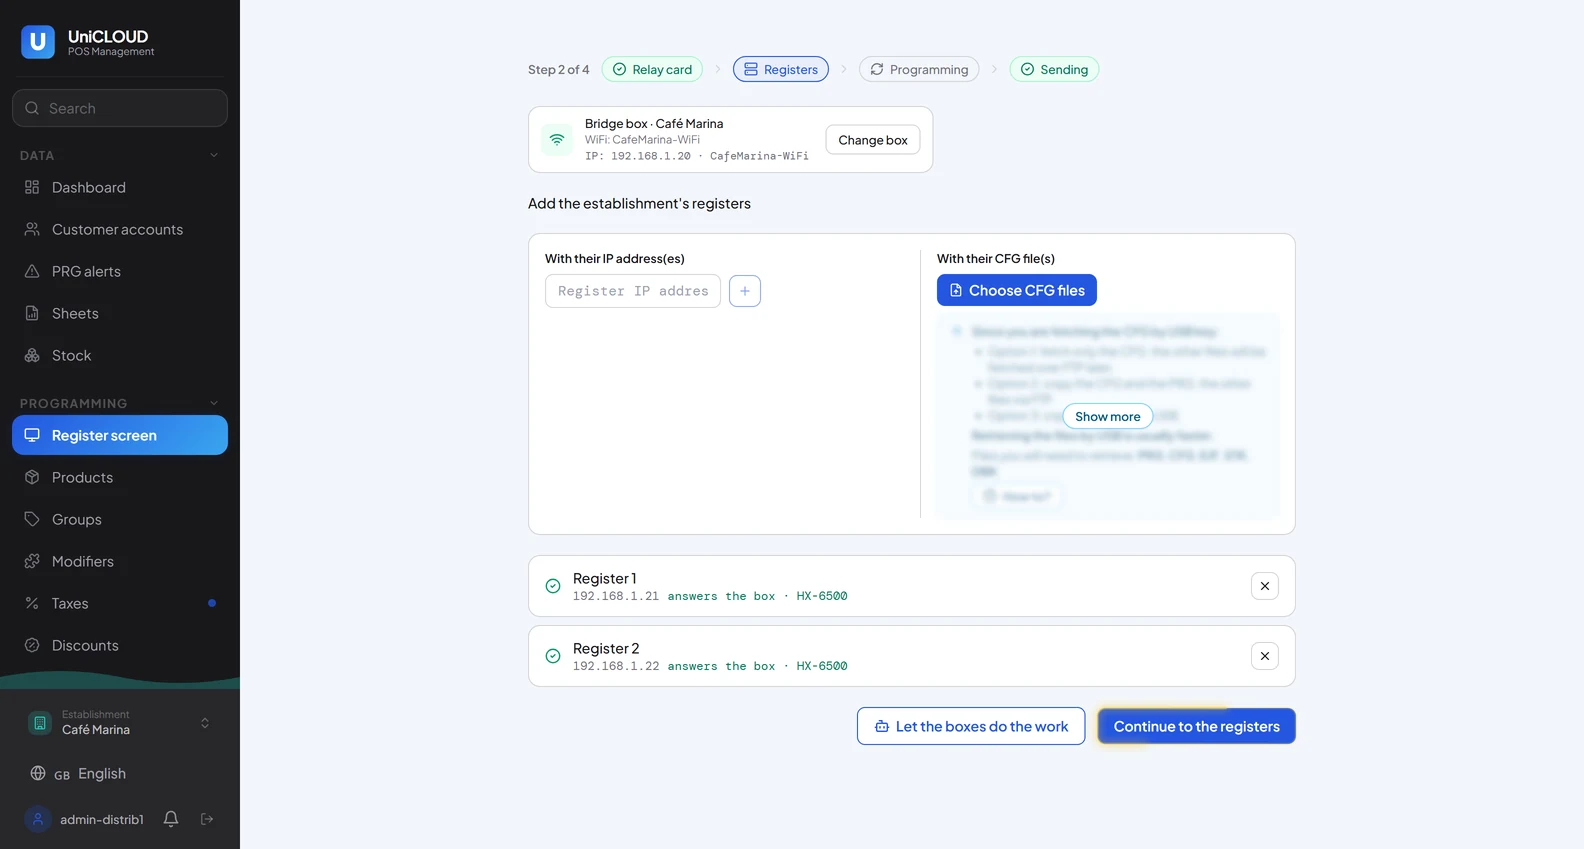
Wait until every register reads «answers the box» with its model.
Press «Continue to the registers».
NoteA red line means the box cannot reach the register: check the IP address, the FTP server and that the register shows its sales screen.
Screen · The box card and the register declarationScreen · Every register answers the box
If you use a USB key: export the files from the register
Only for a register the box cannot reach, or if you prefer to carry the files. «How to?» shows the same keys with photos. The export writes all the files to the key in one operation.
On the register
From the main menu, open «Program».
Open «Others».
Press «Report Push Up».
In the left list, pick a push up that is not defined yet and give it a name.
Add the reports to export, in order: «Load/Save USB» (Program File), «Stock» (Stock Quantity Backup), «Reservations» (Deposit Book Data Backup), «Electronic journal» (EJF), then «Load/Save USB» again (Configure File).
Tick «Push up via USB», then OK.
«Exit», back to the main menu.
From the main menu, press «Report Push Up».
Press the push up you just created.
Press «Push Up Start»: the files are written to the key.
NoteKeep one folder per register on the key: the register names its own files (HX-6500.prg, HX-6500.cfg…).
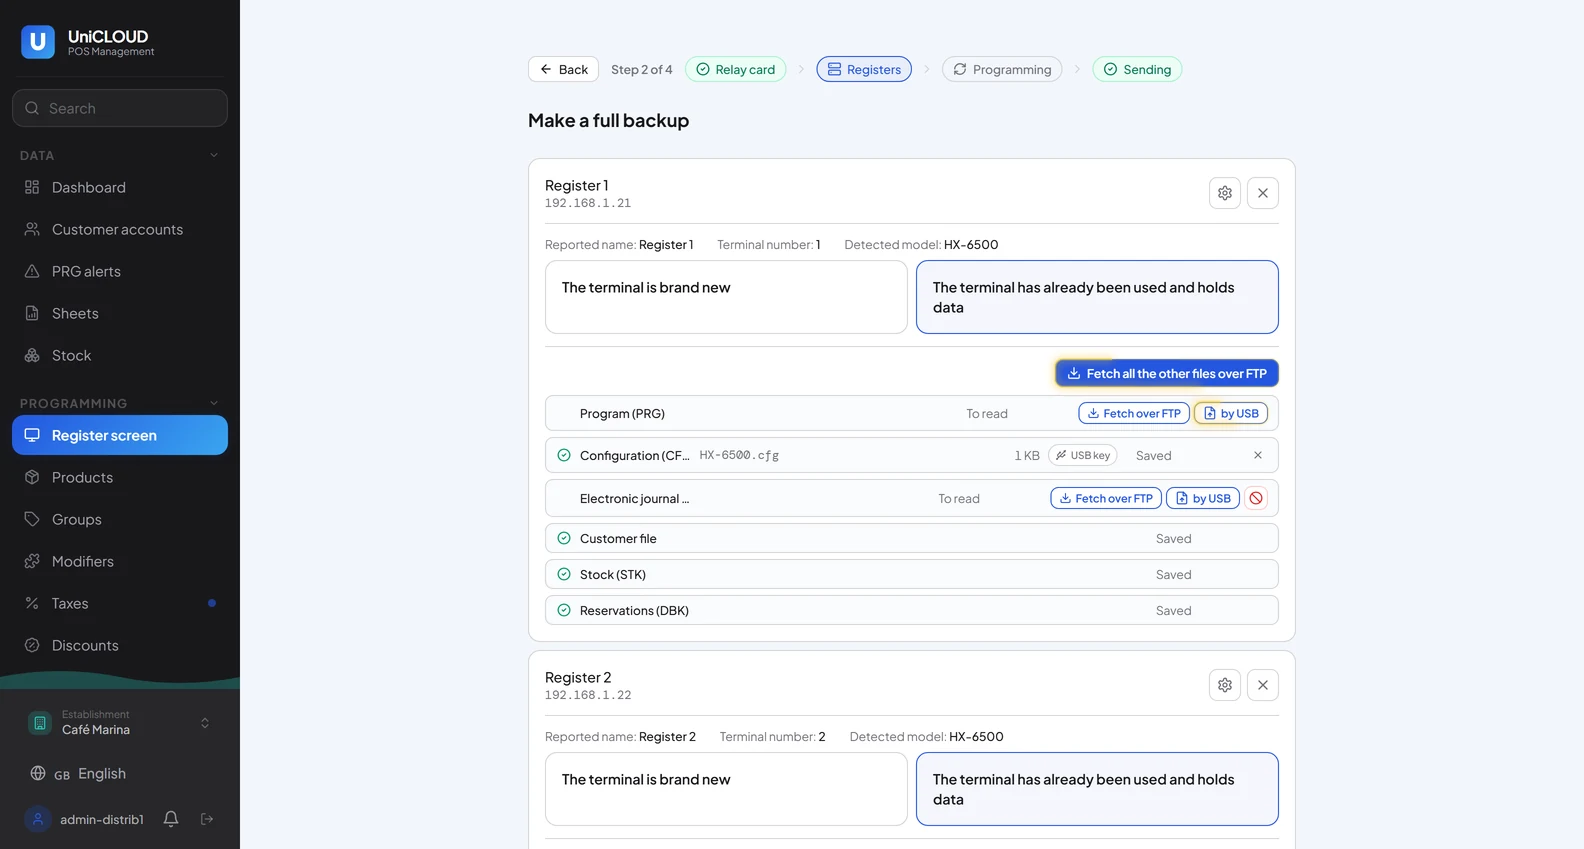
C3Back up the registers
For each register, say whether it is brand new or «has already been used and holds data».
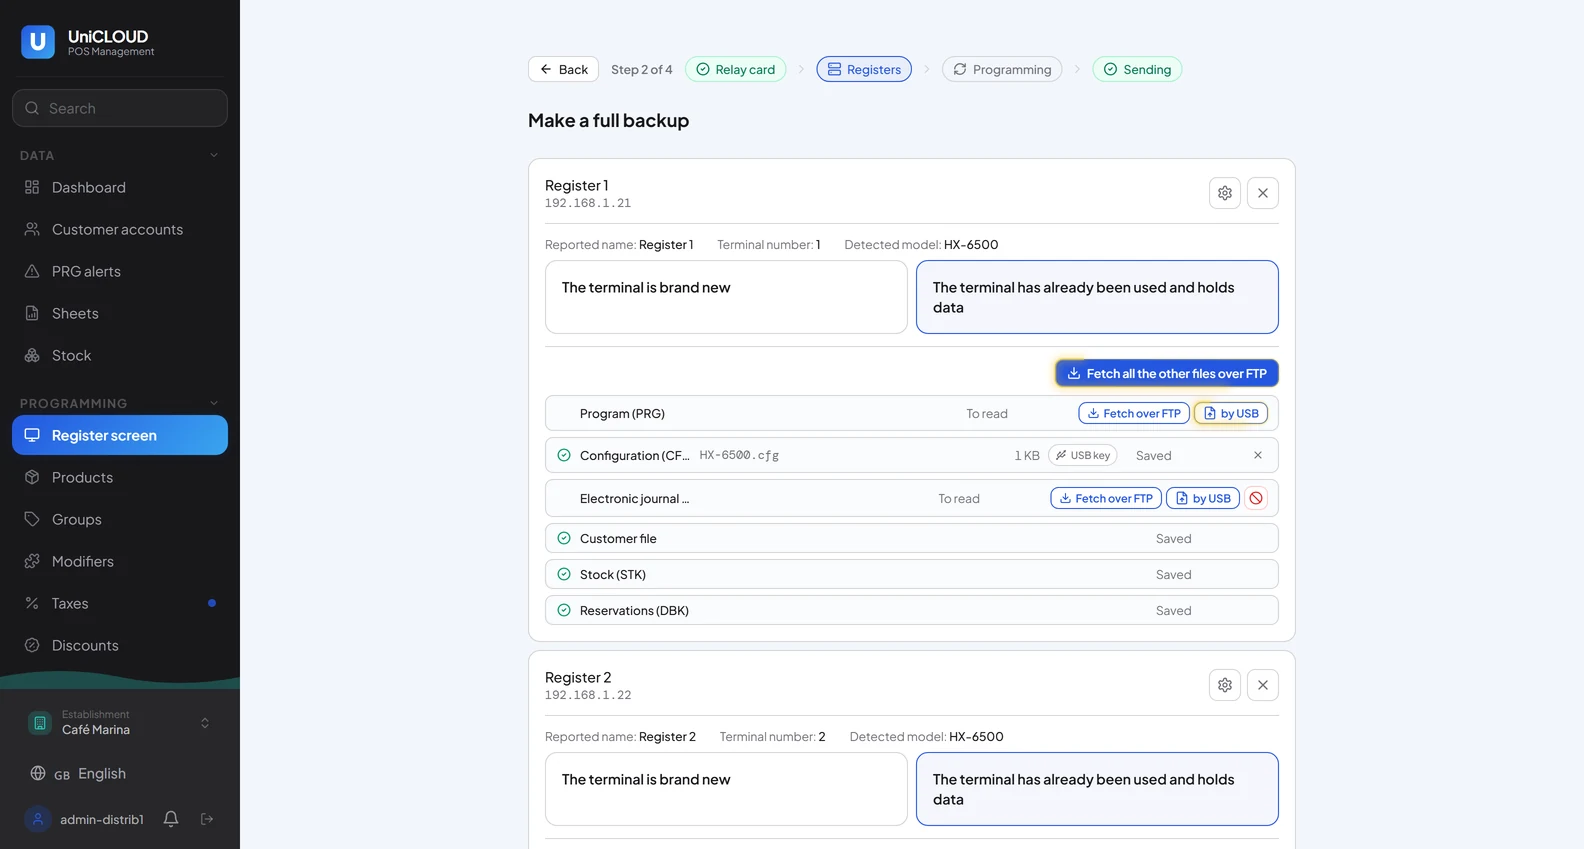
For a used register, press «Fetch all the other files over FTP»: the box reads the program (PRG), the configuration (CFG), the journal and the other files. Any file can also be uploaded «by USB».
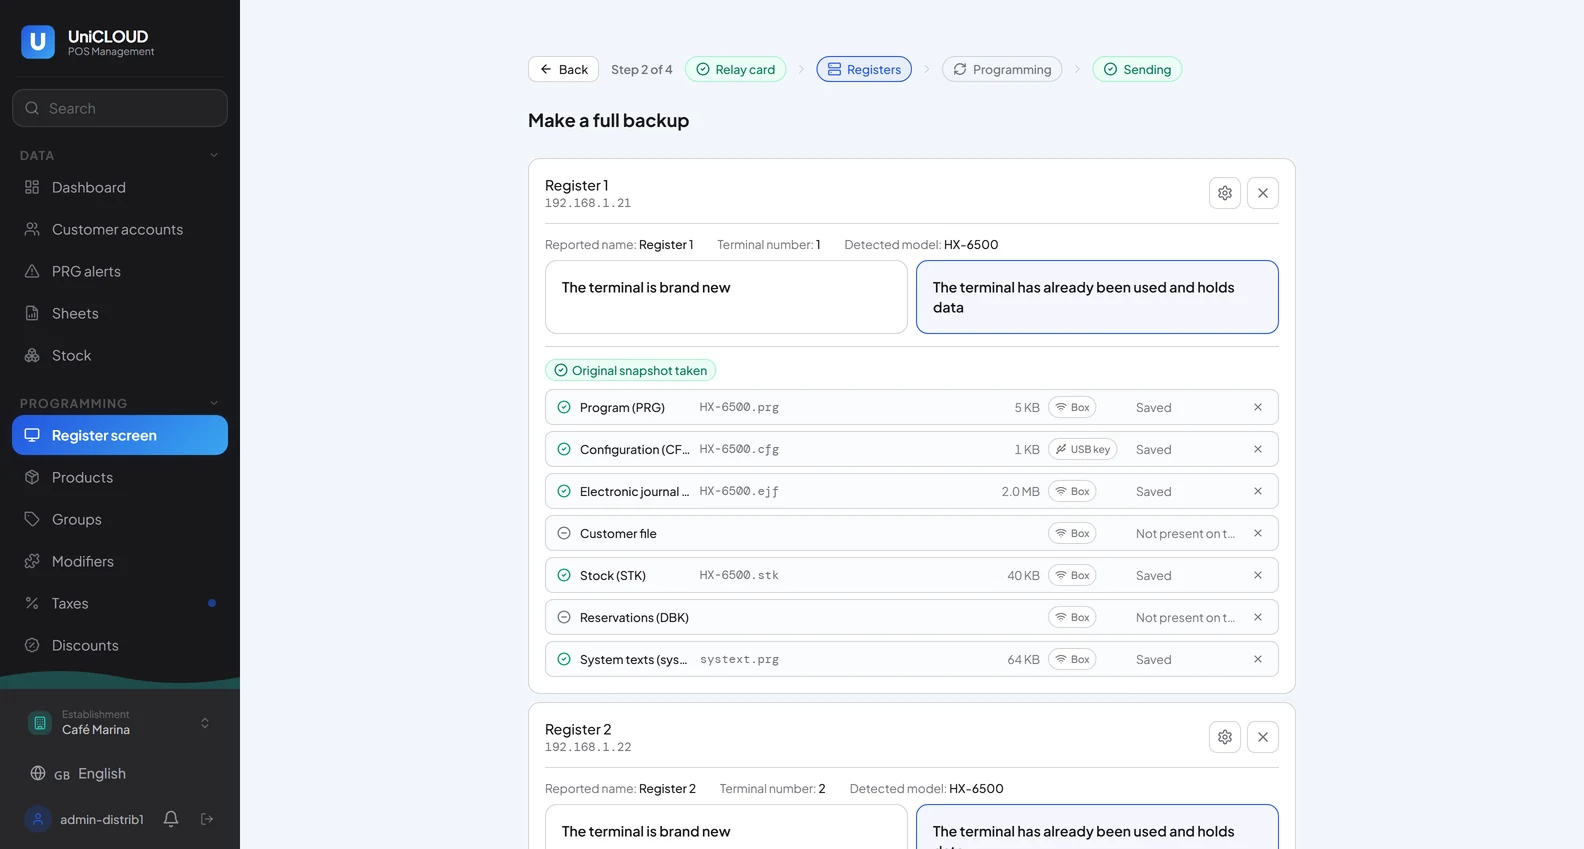
Wait for «Original snapshot taken». A file that does not exist on the register is marked «Not present».
Repeat for each register, then press «Continue to the communication test» at the bottom of the page.
NoteThe snapshot is kept for 30 days: the register can be restored from the console (E2).
Screen · New or used registerScreen · The snapshot card before fetchingScreen · Snapshot taken
C4Run the communication test
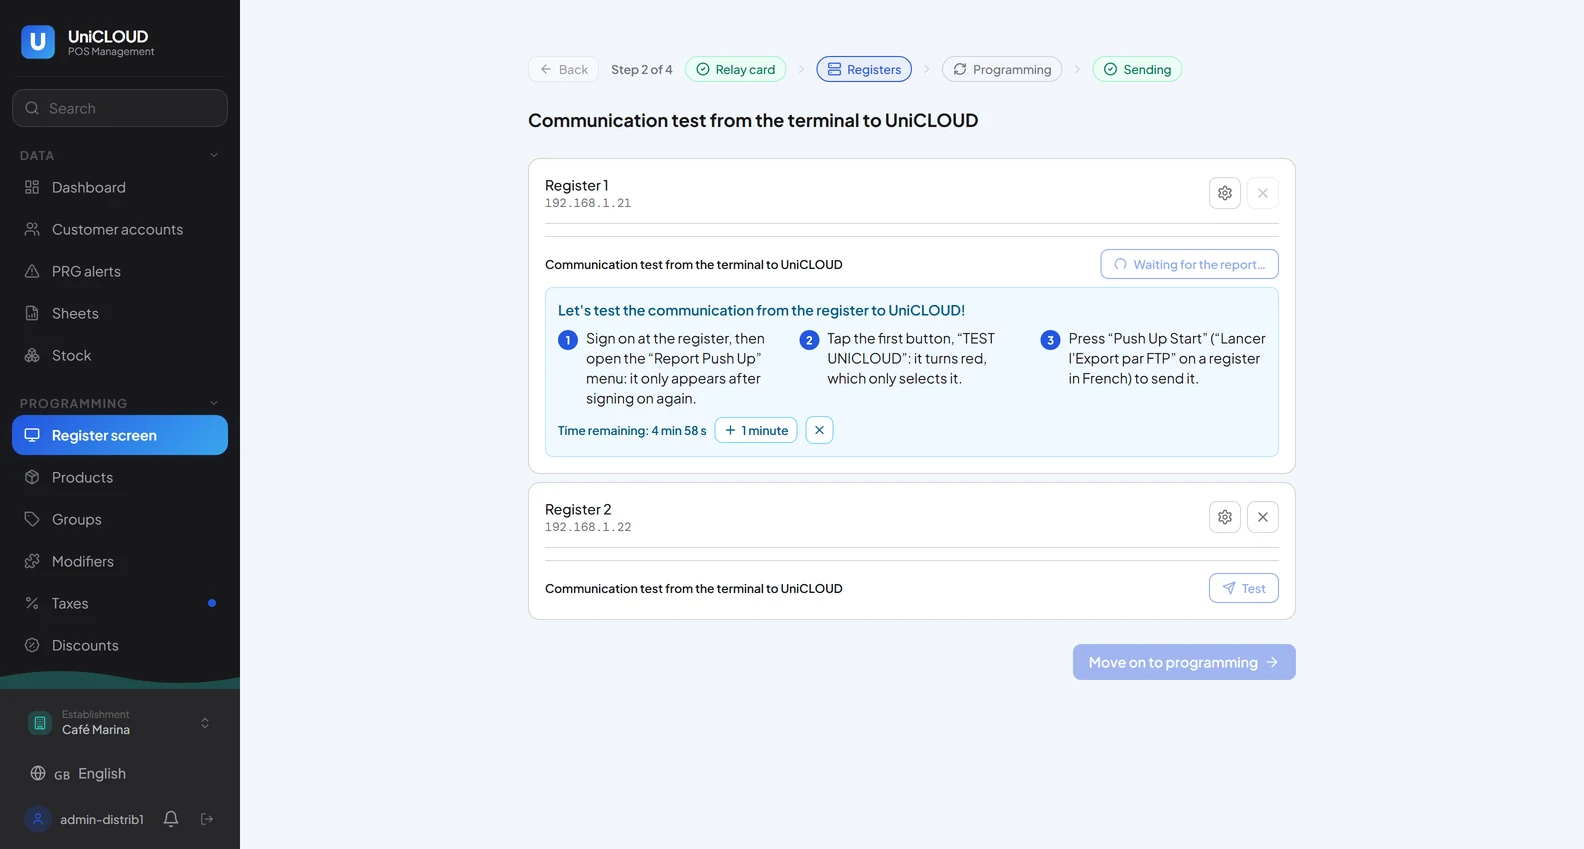
The test starts by itself for the first register: UniCLOUD prepares a test report on it and waits.
On the register: sign on, then open «Report Push Up».
Tap the first button, «TEST UNICLOUD».
Press «Push Up Start» to send the report.
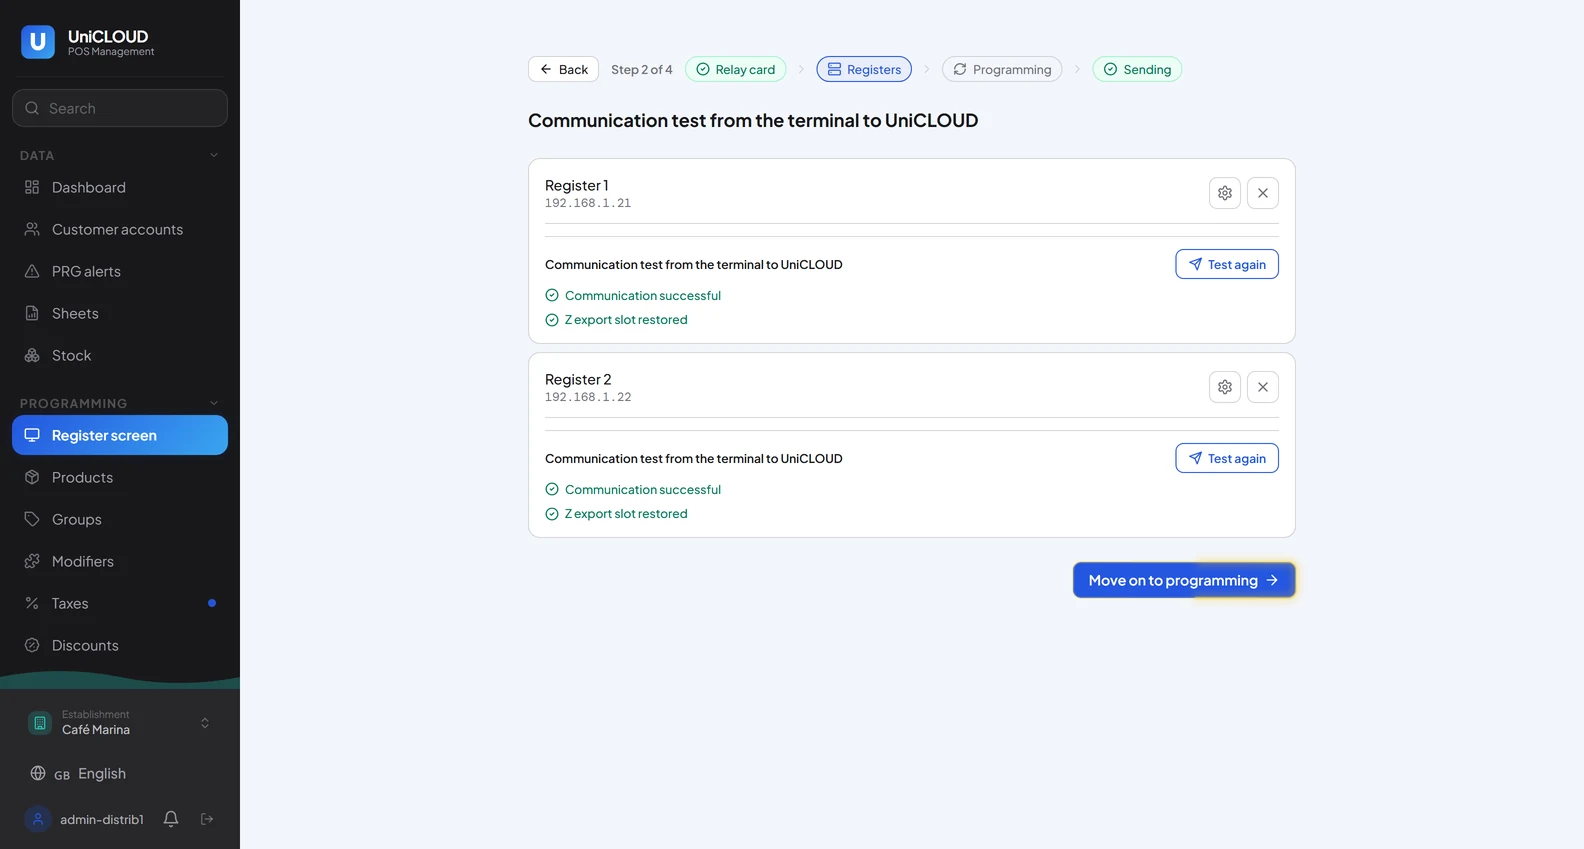
Wait for «Communication successful» and «Z export slot restored» on the register’s line.
Press «Test» on the next register, then «Move on to programming».
NoteThe countdown gives five minutes; «+ 1 minute» extends it. If the menu does not show, sign off and on again. If the test times out: register on its sales screen, box online, then «Test again».
Screen · Waiting for the register’s reportScreen · Both registers tested
C5Choose the reference register and settle the conflicts
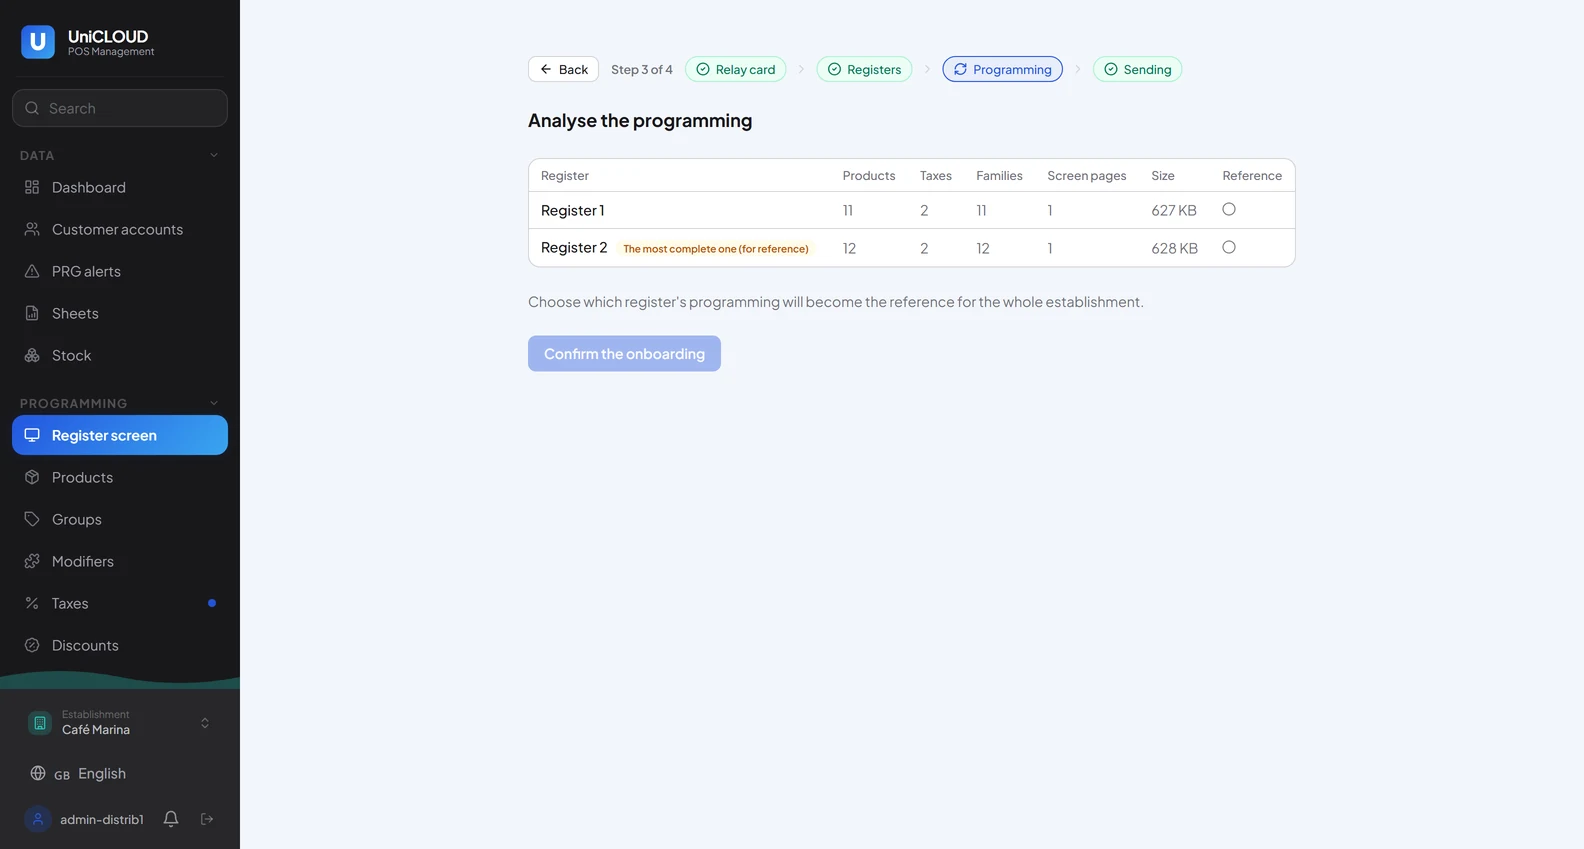
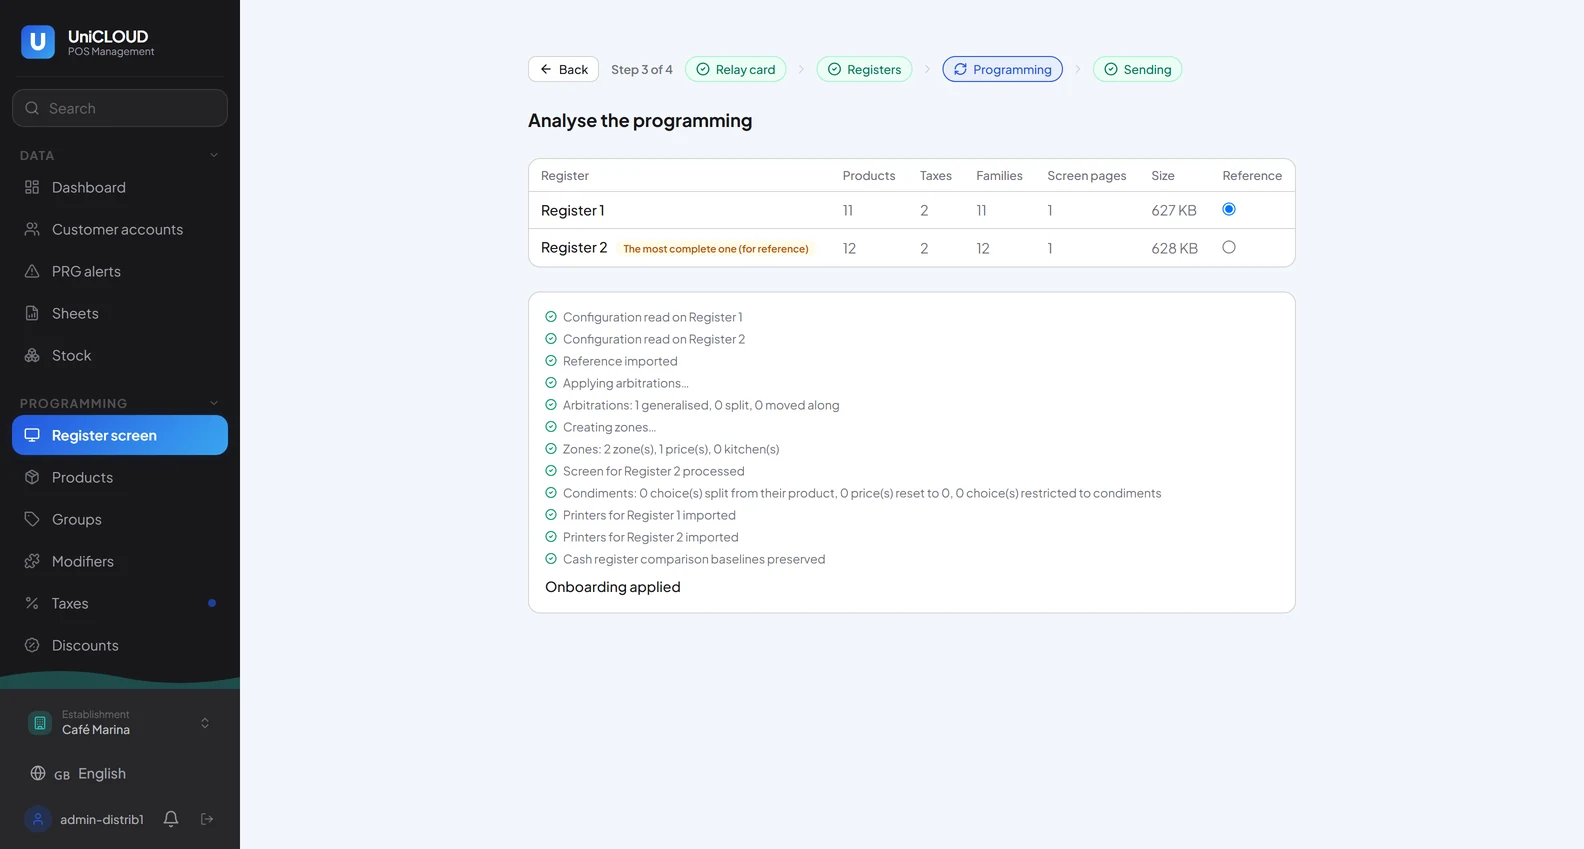
Tick the «Reference» register, even when the programs look identical: its program becomes the establishment’s. The register flagged «The most complete one» is the usual choice.
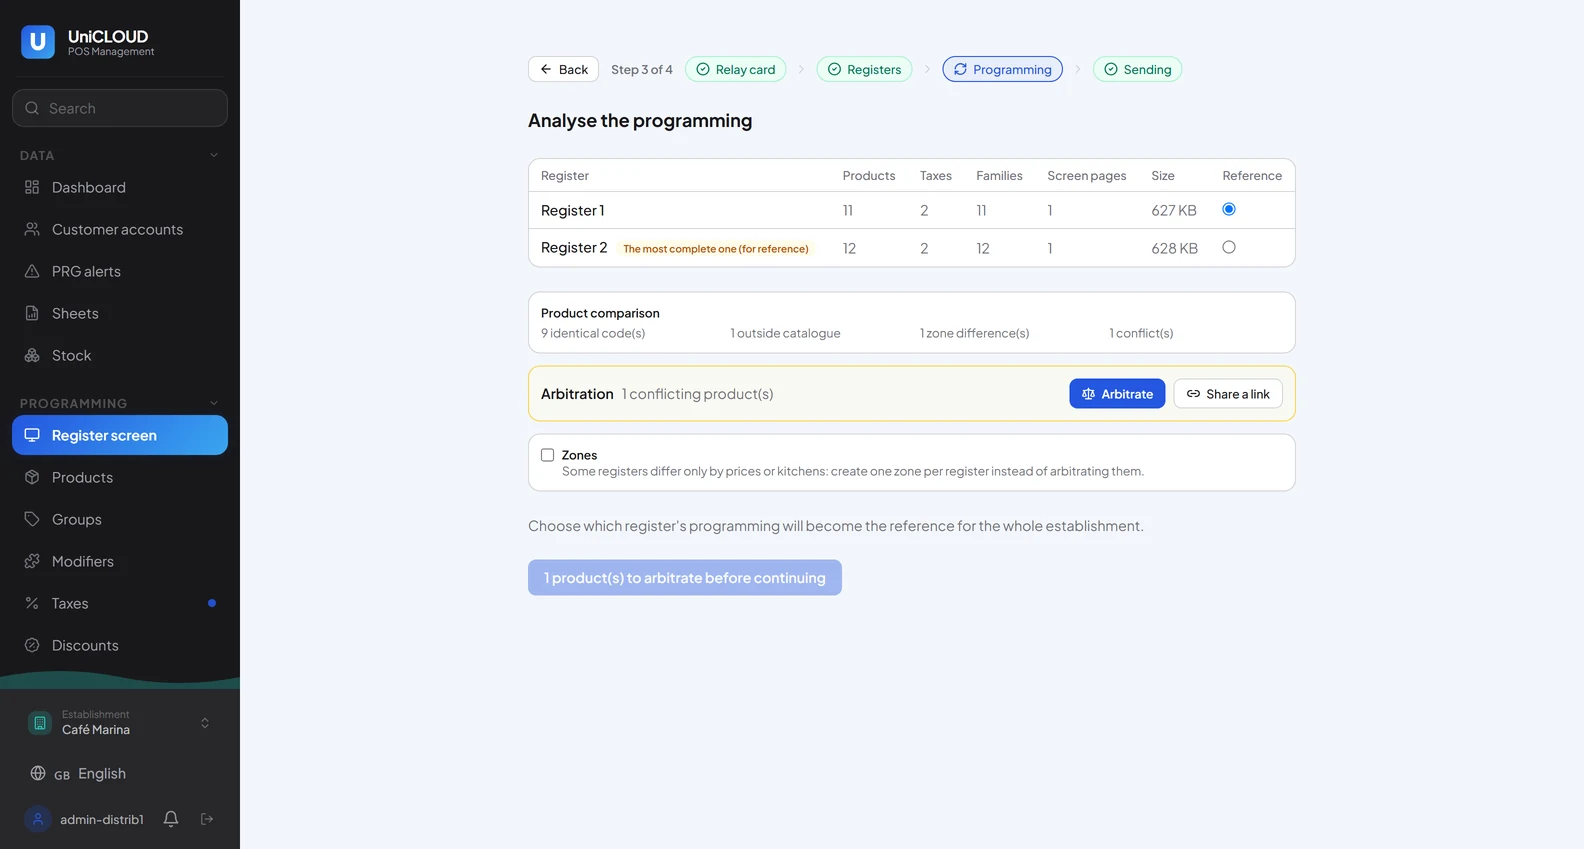
Read the comparison: identical codes, products on one register only («outside catalogue»), zone differences (same product, other price or kitchen) and conflicts (same code, different product).
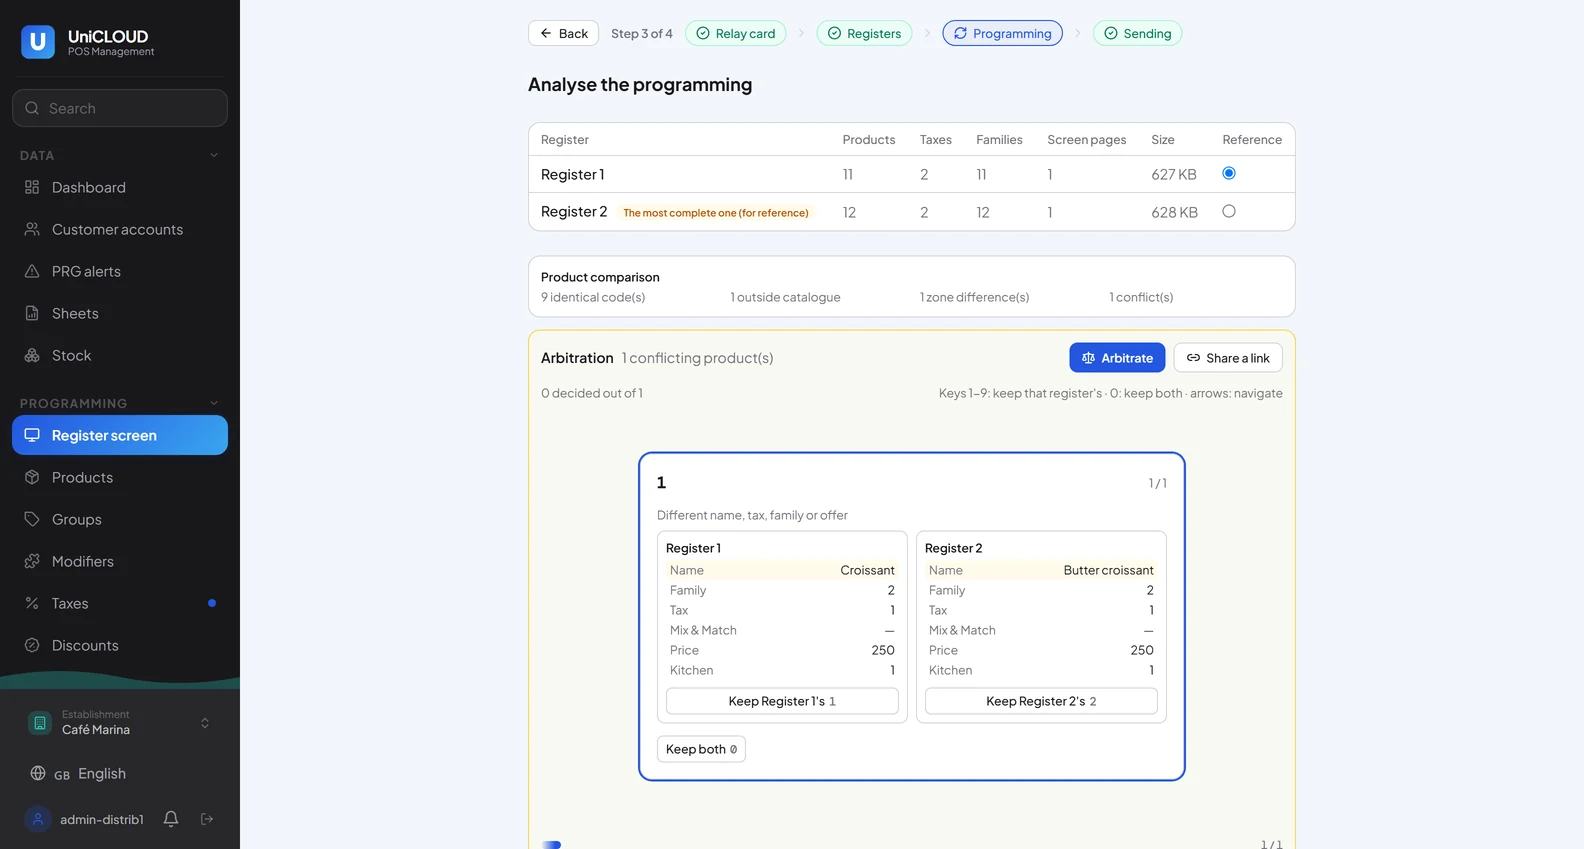
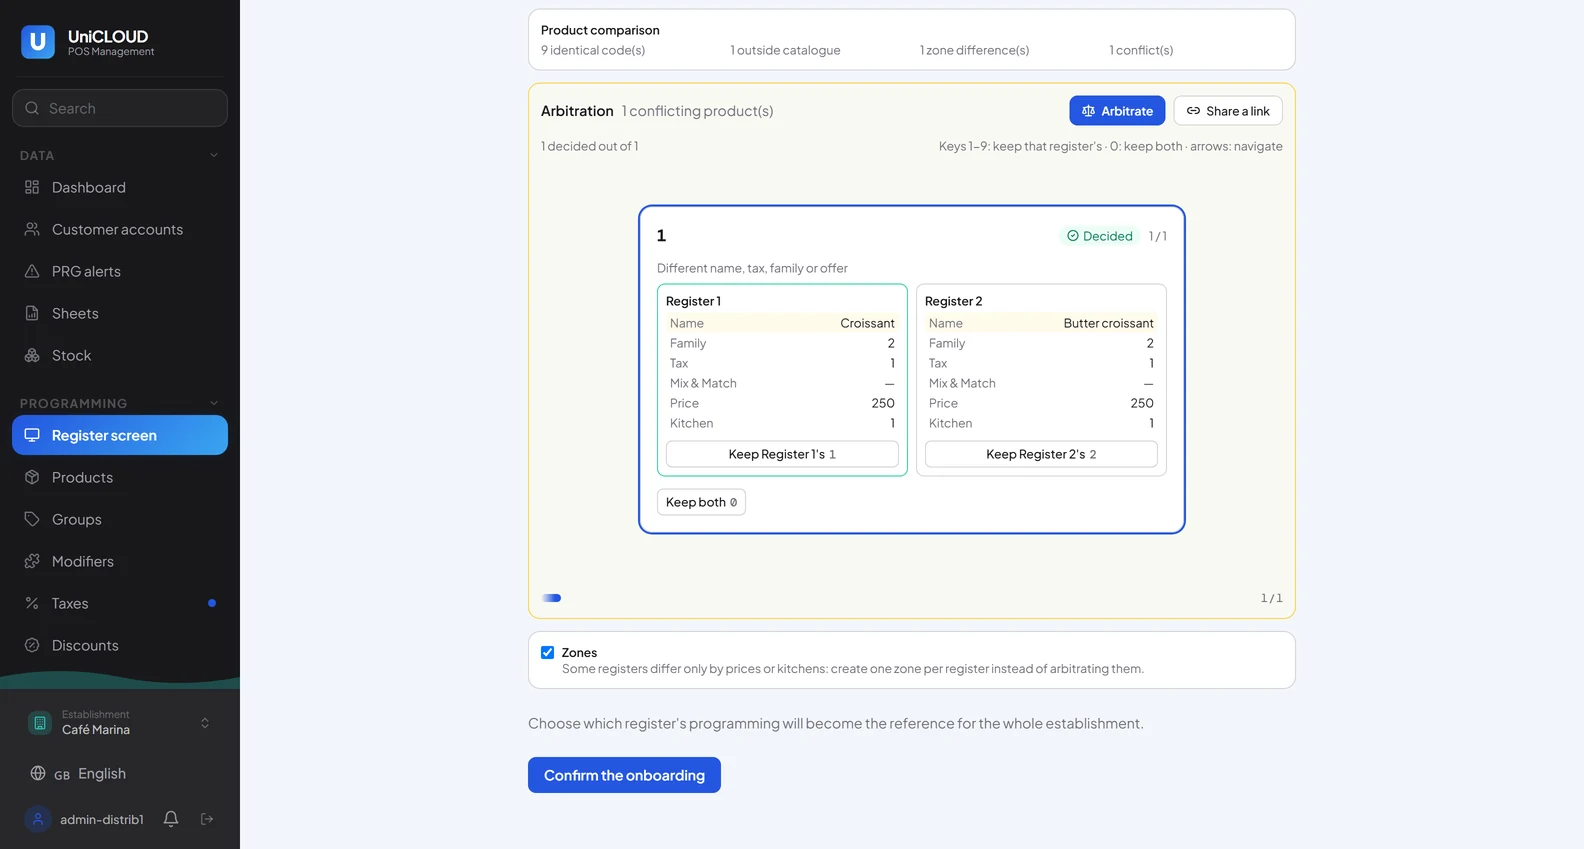
Press «Arbitrate»: one card per conflicting product, one column per register. Keep one register’s version («Keep Register 1’s») or «Keep both», which gives the second product a new code. Keys 1 to 9 keep that register’s version, 0 keeps both, arrows navigate.
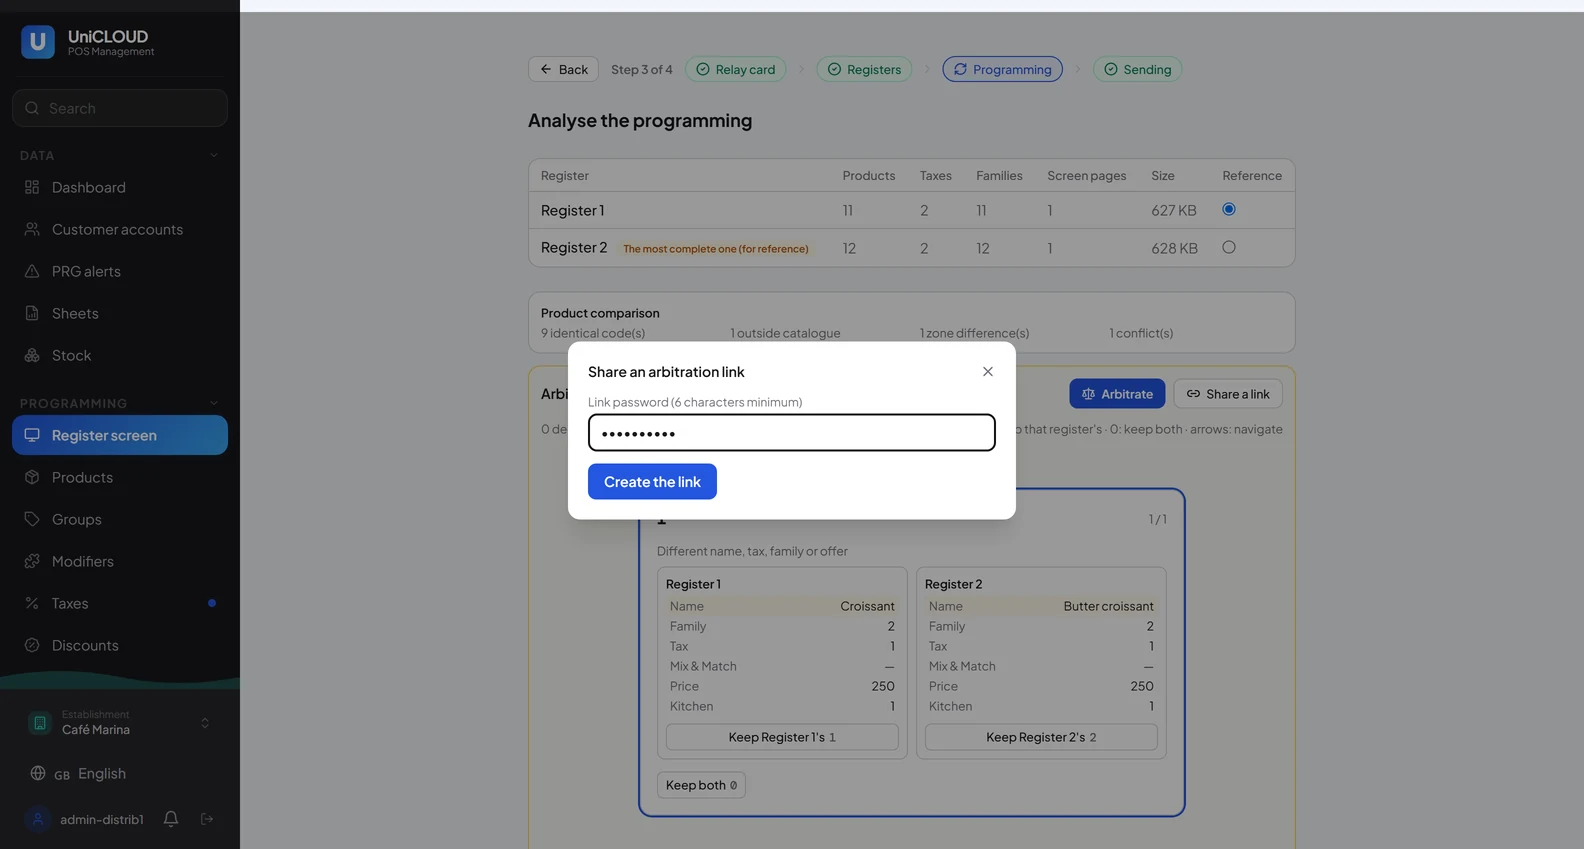
Or press «Share a link»: type a password (6 characters minimum) and press «Create the link». The merchant opens the link on any device and settles the conflicts; the screen follows live.
Note«Zones» keeps one price list per register.
Screen · The programming analysisScreen · The product comparisonScreen · One card per conflictScreen · Share a link
C6Confirm the onboarding and choose the business mode
When no conflict remains, press «Confirm the onboarding»: the reference program is imported into UniCLOUD (products, taxes, families, screen, printers, zones).
Wait for «Onboarding applied». Nothing has been sent to the registers yet.
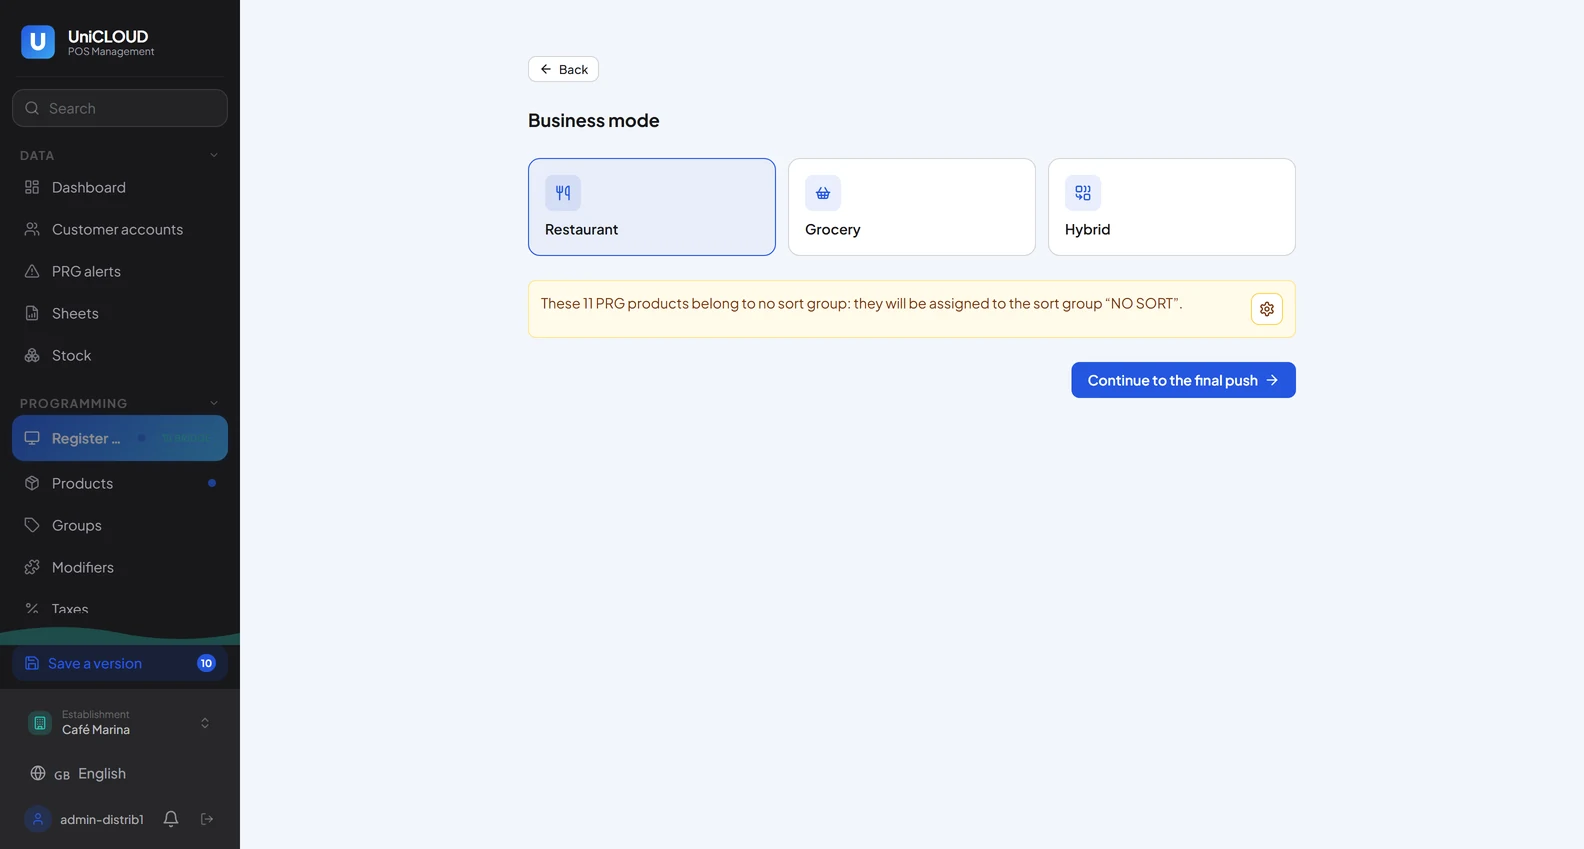
Press «Restaurant», «Grocery» or «Hybrid»: the choice decides which pages the merchant sees.
Press «Continue to the final push».
NoteFor a grocery, an import of the previous Uniwell Lynx files appears here. The yellow notice about products without a sort group needs no action.
Screen · Ready to confirmScreen · Onboarding appliedScreen · The business mode
C7Send the program to the registers
Pick a quiet moment: each register is unavailable while it receives the program and restarts. The registers must show their sales screen, not the manager menu.
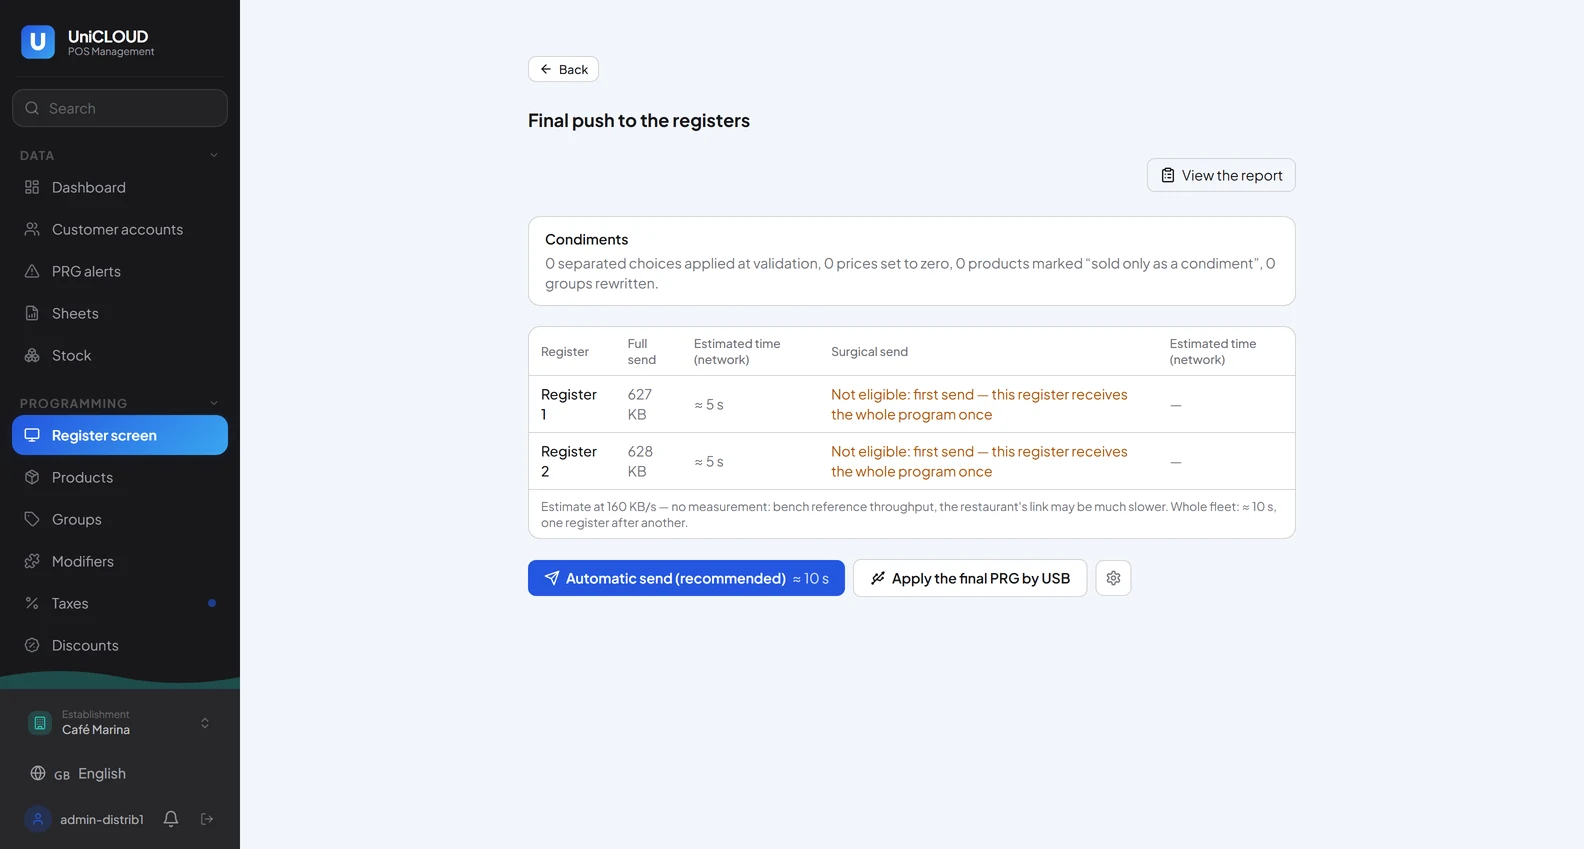
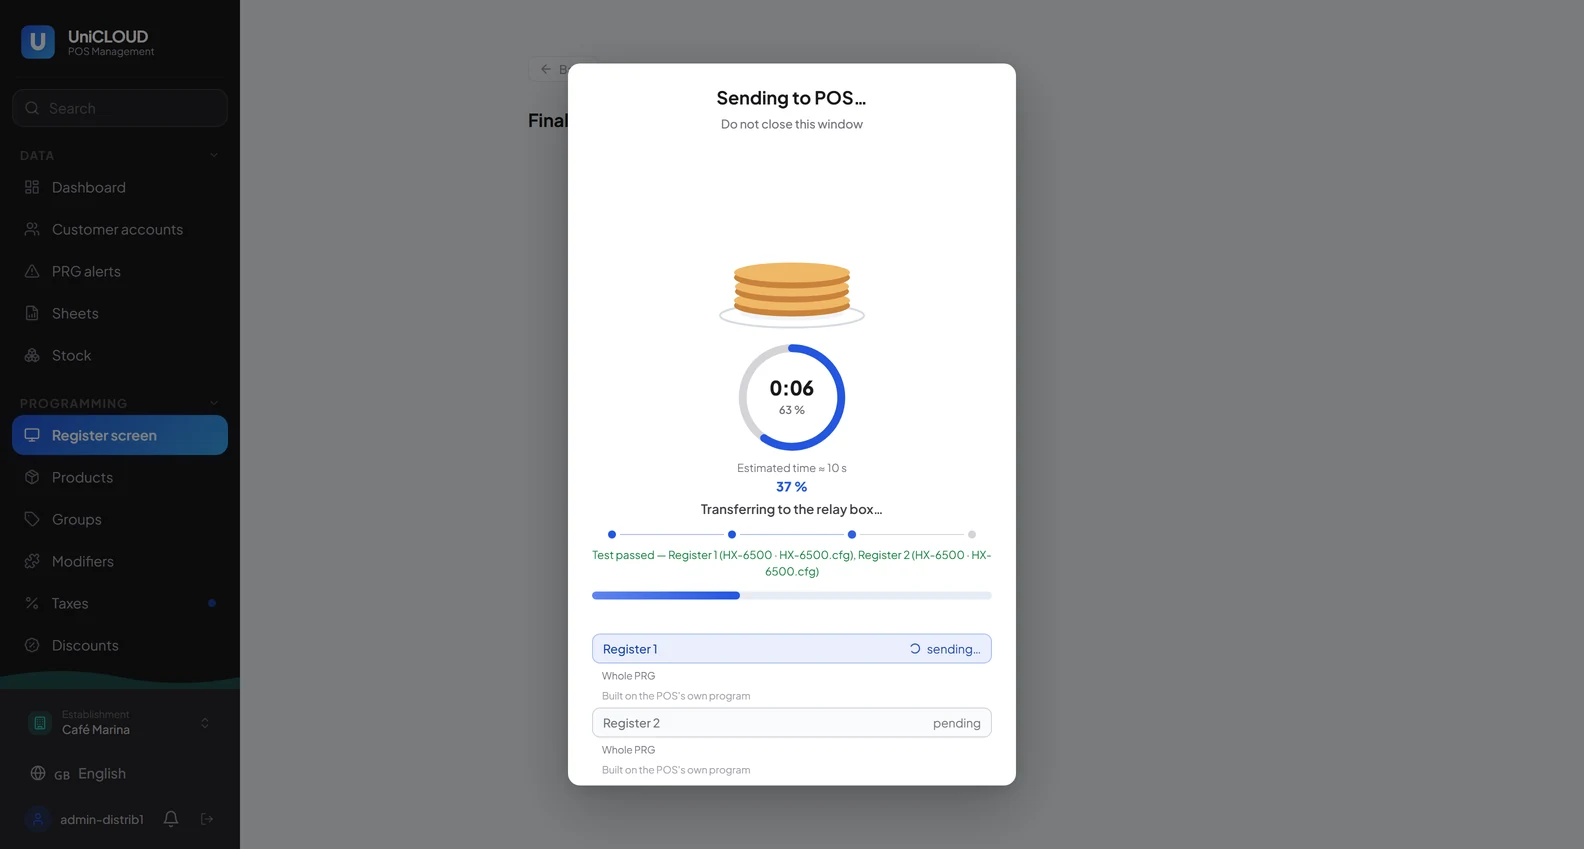
Press «Automatic send (recommended)». «Apply the final PRG by USB» prepares the files instead.
Do not close the window. If the estimate is exceeded, the send continues: wait.
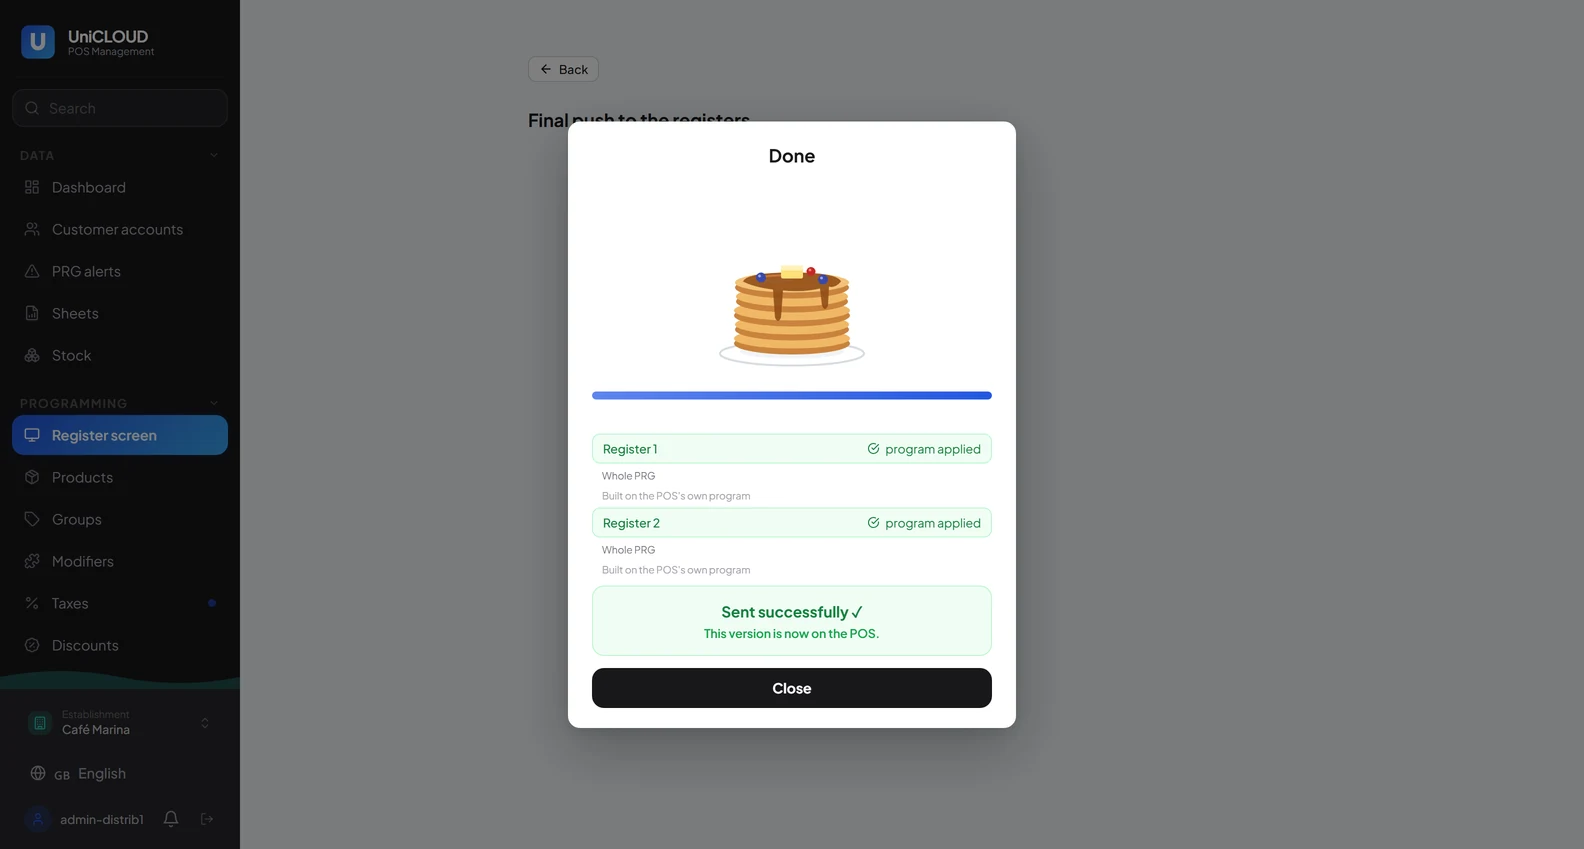
«Sent successfully»: every register reports the program applied. «received, not applied yet»: the register was busy, it applies the program at its next restart.
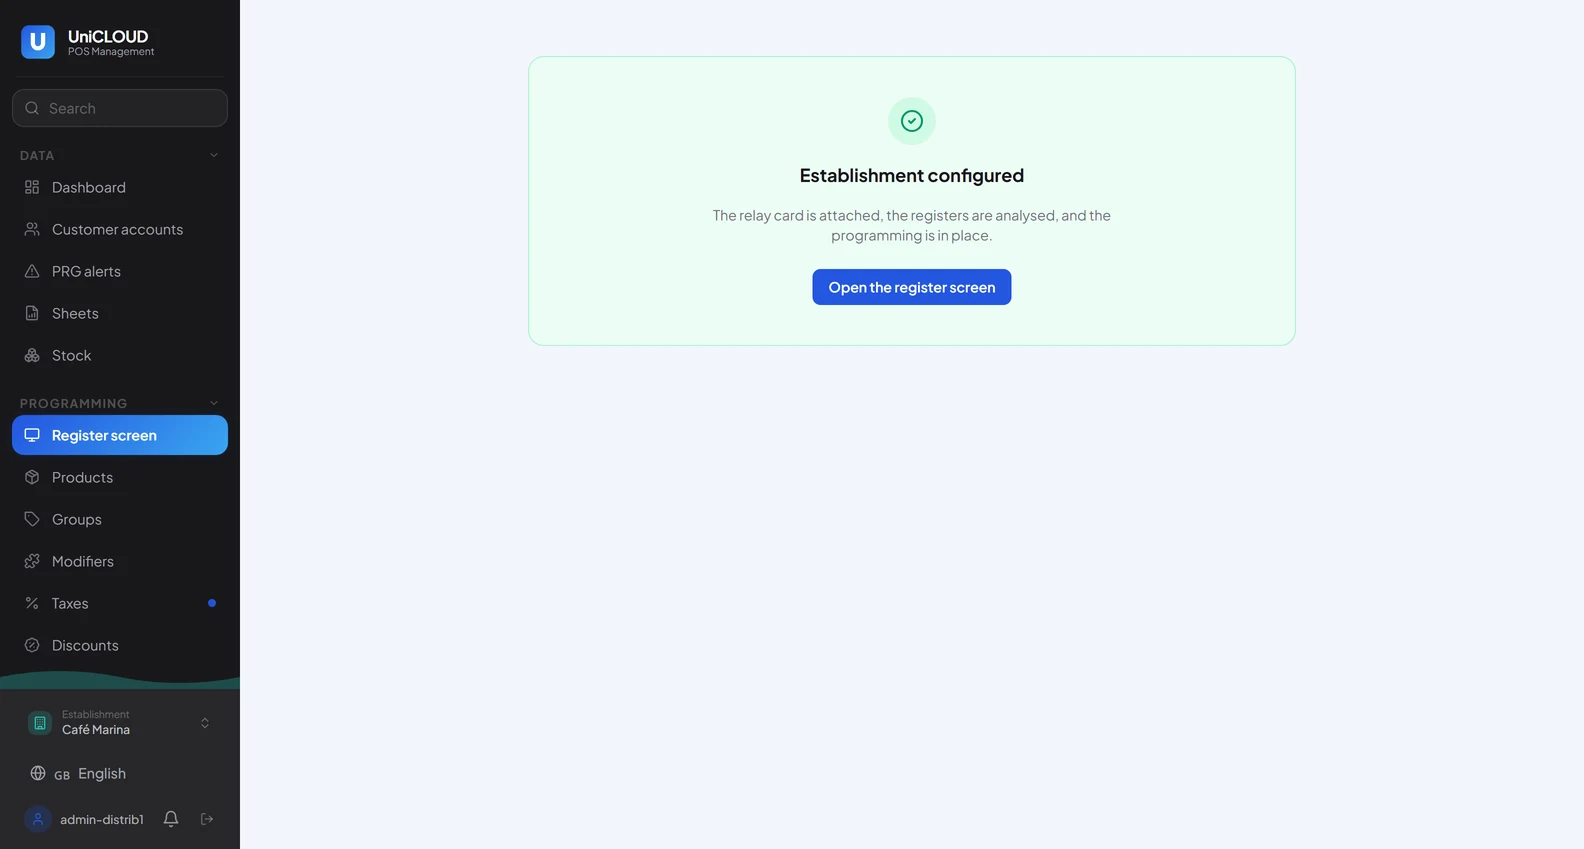
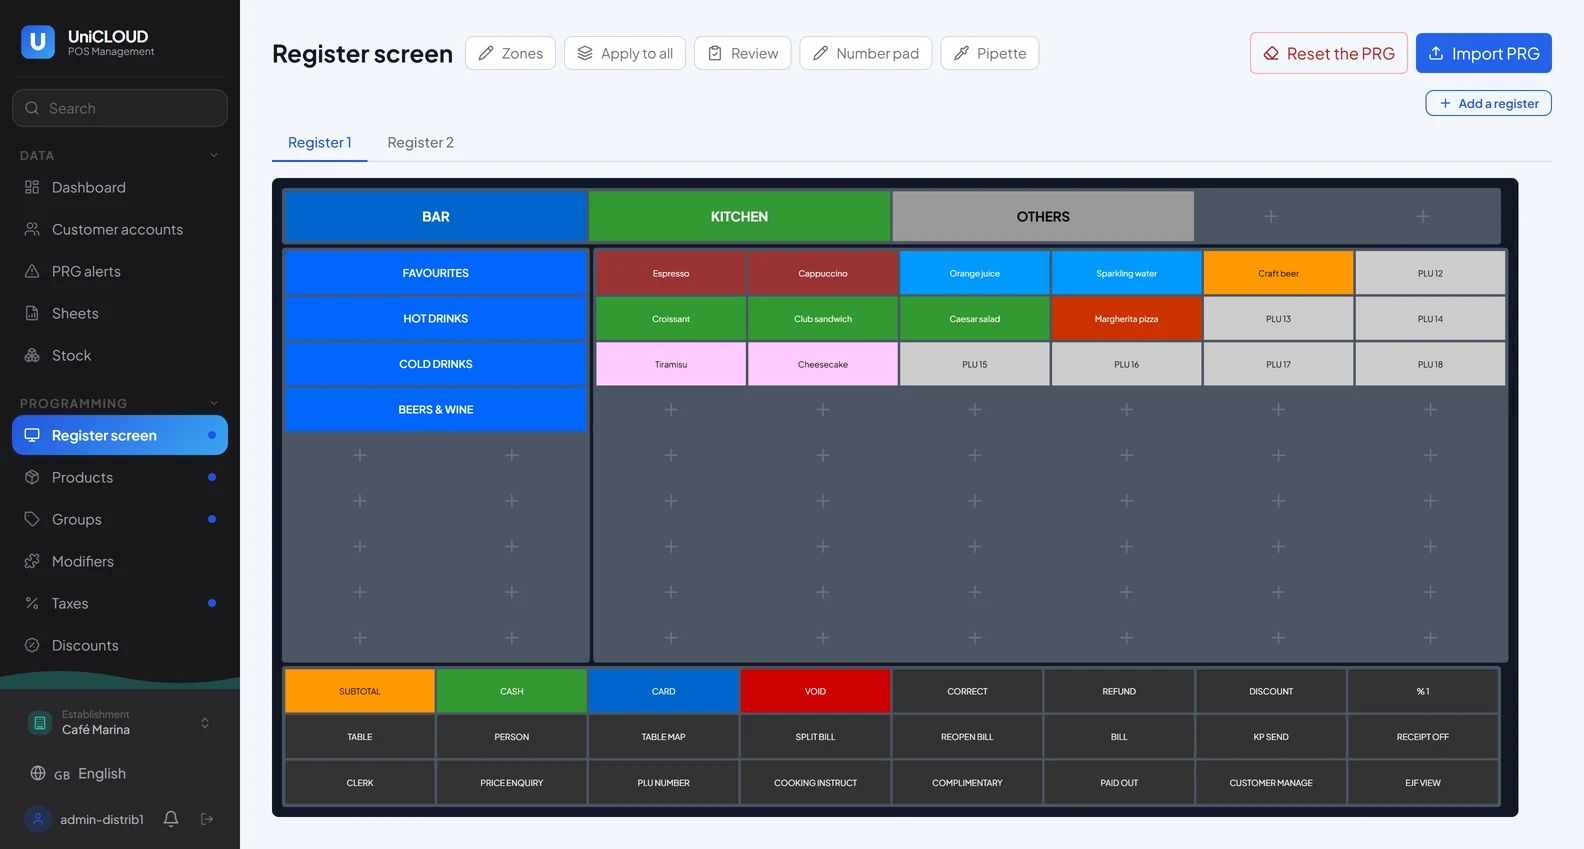
Press «Close», then «Open the register screen».
Restart each register once: the configuration (CFG) is taken into account only after a restart.
Note«View the report» previews the change report kept in the console.
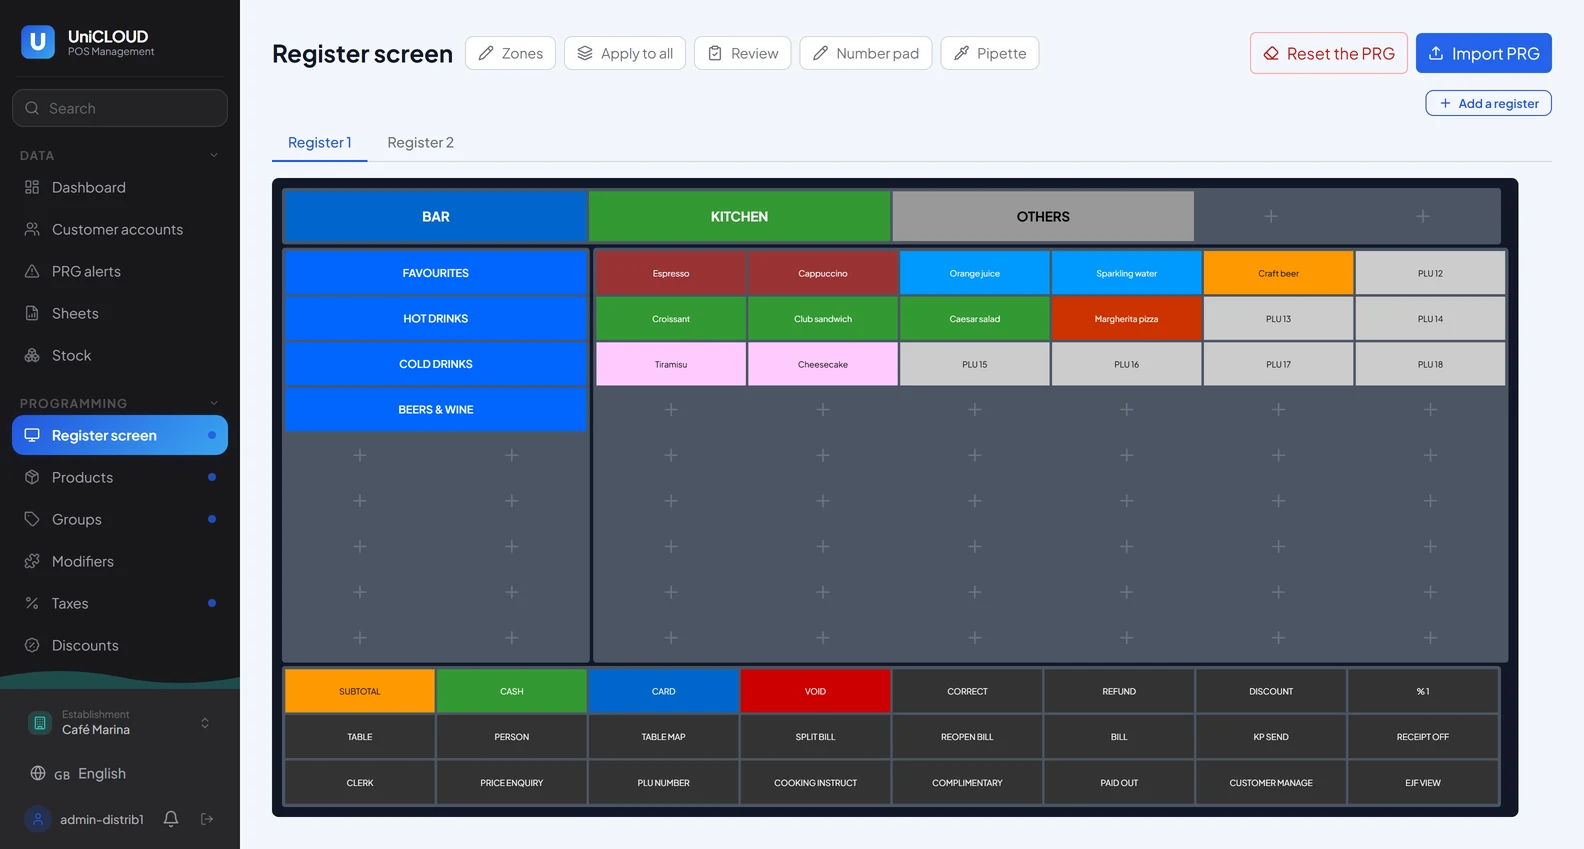
Screen · The final sendScreen · SendingScreen · Sent and appliedScreen · Establishment configured
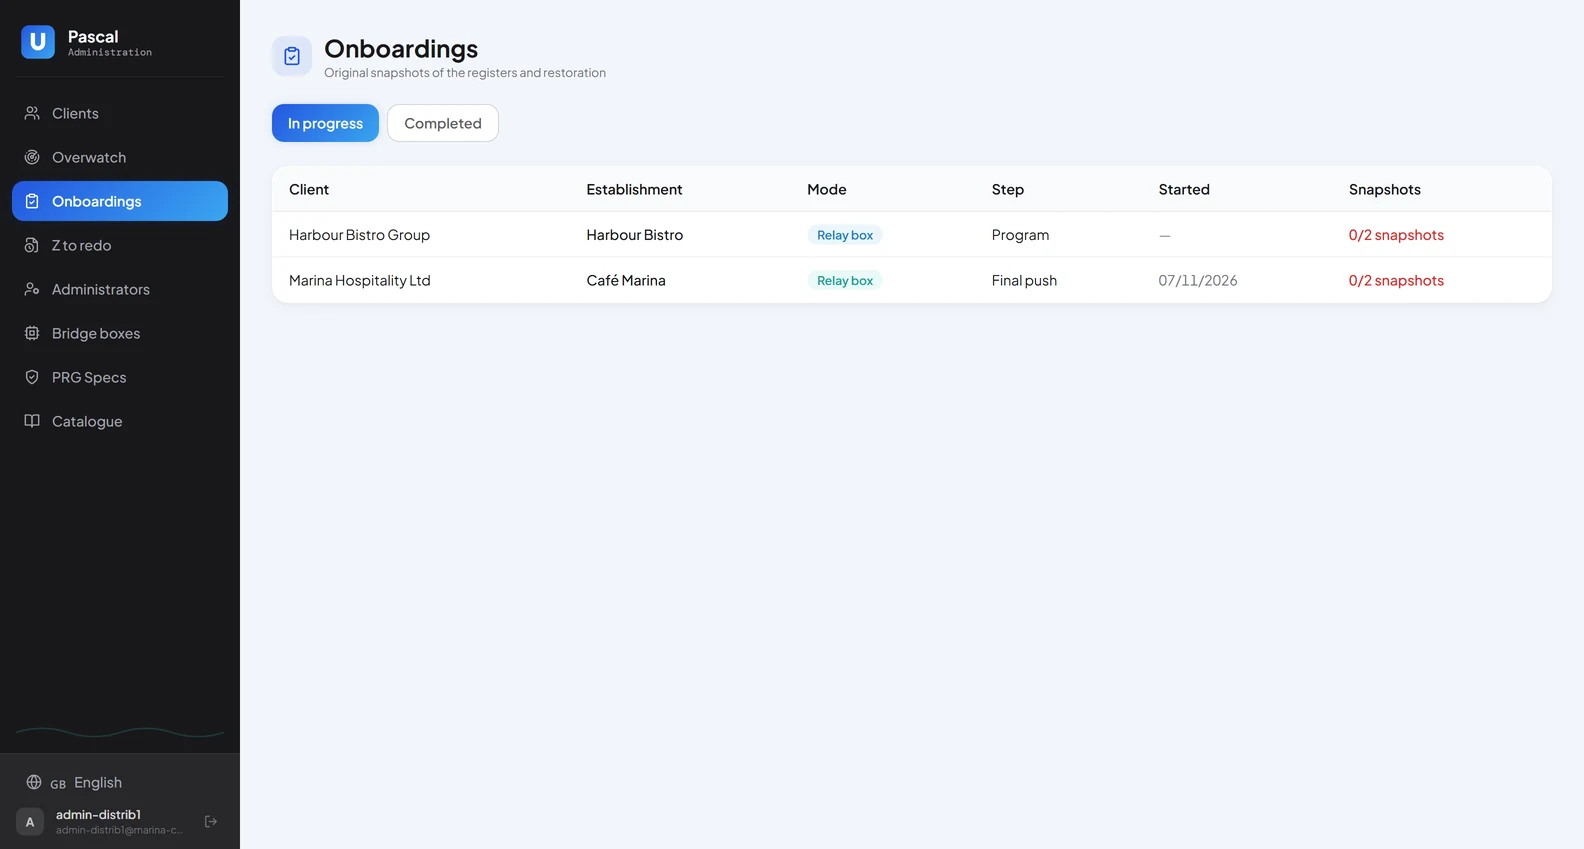
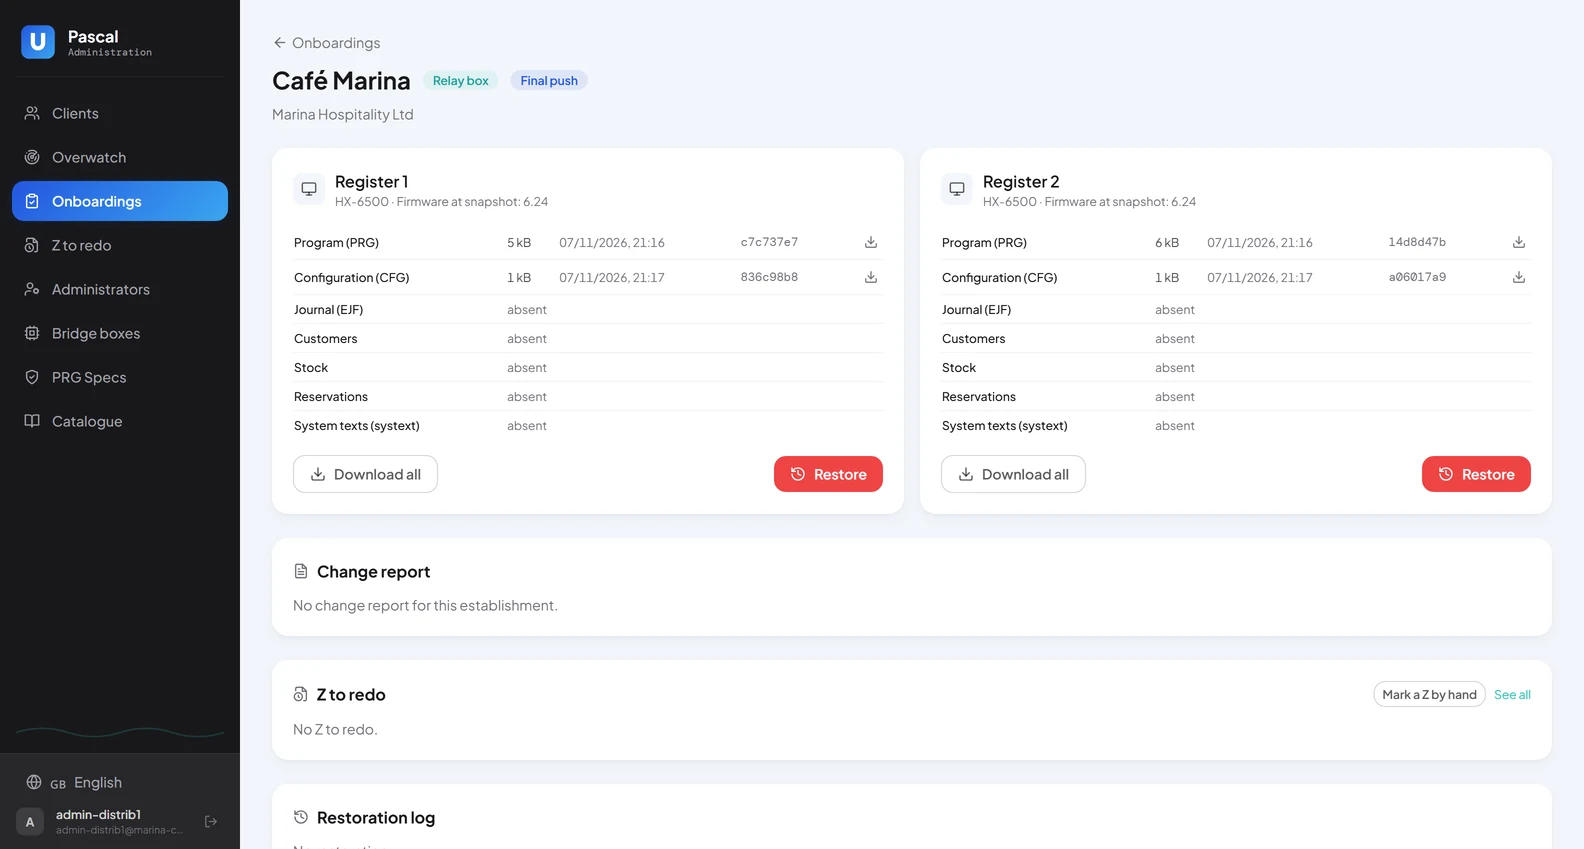
Open «Onboardings»: the establishments in progress and completed, with the mode, the current step and the number of snapshots.
Screen · The Onboardings page
E2Restore a register or download its snapshot
Open an onboarding.
Press «Download all» to keep a register’s snapshot files.
Press «Restore» to put the register back to its original program and configuration, through the box, within 30 days of the onboarding.
Screen · An onboarding with its snapshots
E3Add a register later
On an establishment in service, open «Register screen» and press «Add a register».
Declare the new register, or one used elsewhere before: the onboarding takes its snapshot and sends it the establishment’s program, built on the register’s own program.
Same onboarding, three steps instead of four. Registers able to run firmware 7.00: HX-3500, HX-6500, HX-7500.
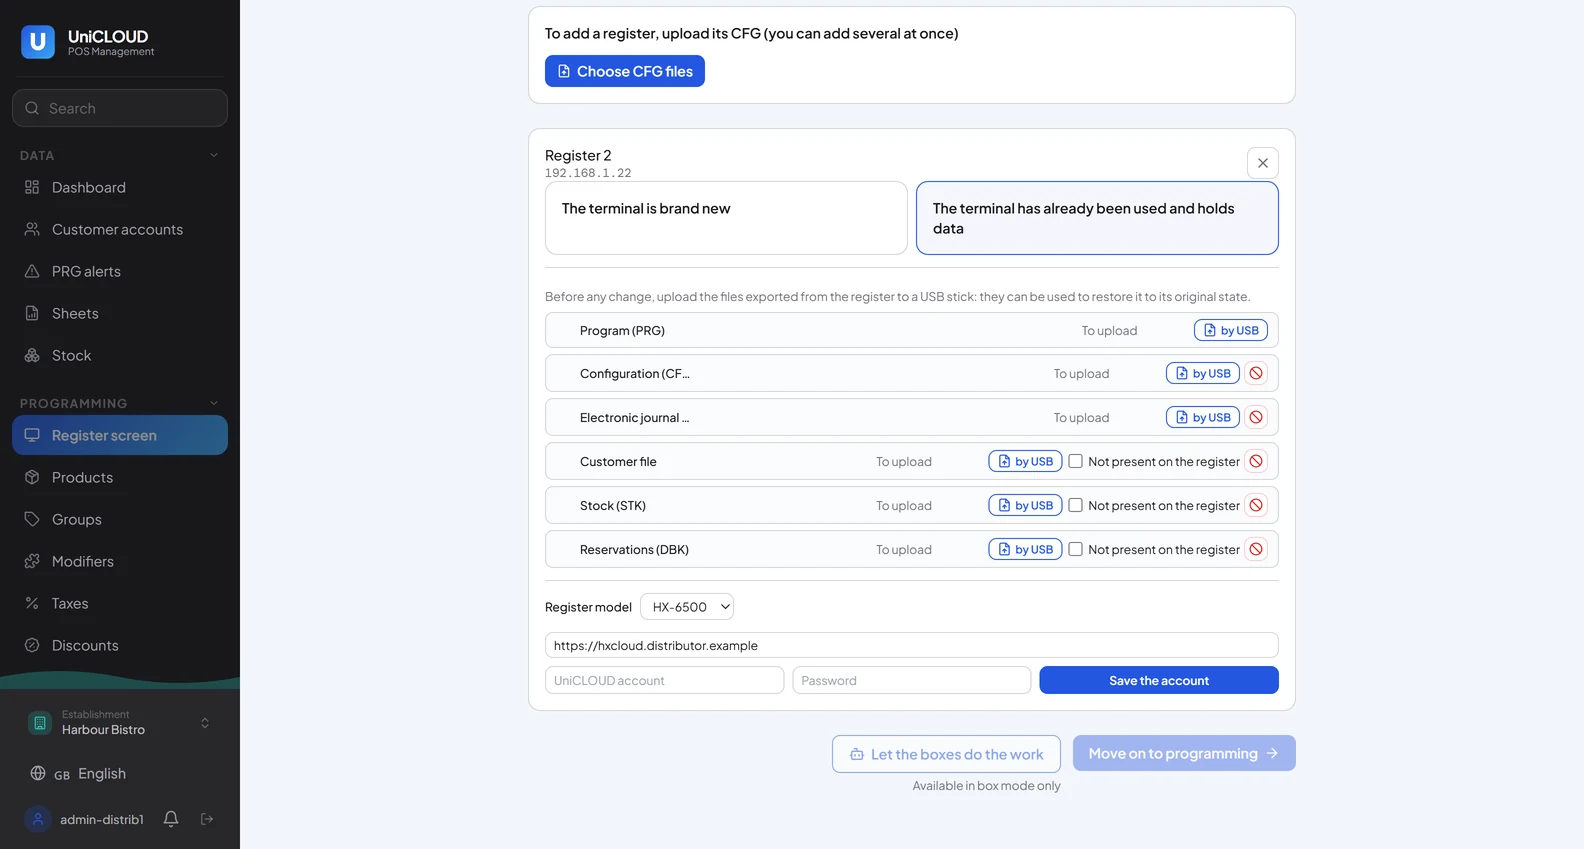
F1Enrol the register on HX Cloud
At the installation mode (B2), press «Choose» under «HX Cloud».
Declare each register by its CFG file (firmware 7.00 or later) and upload its snapshot files from the key.
Check the server address (prefilled), the «UniCLOUD account» and the password, then press «Save the account»: the register is enrolled on the HX Cloud server.
The final send prepares the files for the USB key instead of the box.
NoteUniCLOUD then reads the register’s data from the HX Cloud server. This example uses a second establishment, Harbour Bistro.
Screen · The HX Cloud enrolment form
F2What changes without a box
With the bridge box
HX Cloud
Sales and dashboard
Yes
Yes
Products, prices, groups, taxes, clerks
Full programming
Main attributes
Register screen, kitchens, printing, clerk rights on the register
Yes
No
Click & Collect and kiosk
Yes
No
Sending a program
Through the box
Full program: USB key. Attribute changes: HX Cloud server