U

UniCLOUD

POS Management

Quick guide

Onboarding a client

Quick guide · Bridge box path, with the HX Cloud variant · November 2026

UniCLOUD · Onboarding a client · Quick guide1 / 10

Overview

The road map

The slides that follow carry the numeral of the step they belong to.

Bridge box

  1. I

    Before the visit

    A bridge box enrolled for your distributor. In the console: the client if it is new, at least one establishment and one user account.

  2. II

    Bring along

    A laptop with an internet connection and the enrolled bridge box.

  3. III

    The merchant has

    A Uniwell HX-7500, 6500, 5500, 4000 or 3500; an internet connection; one free Ethernet port and one power socket.

  4. IV

    On site

    Run the onboarding and follow the guided steps.

  5. V

    Hand over

    Give the merchant their credentials; show them how to sign in and edit products.

HX Cloud

  1. I

    Before the visit

    In the console: the client, at least one establishment and one user account. No box.

  2. II

    Bring along

    A laptop with an internet connection and a USB key: the register’s files travel by key.

  3. III

    The merchant has

    A Uniwell HX-7500, HX-6500 or HX-3500 able to run firmware 7.00, connected to the internet.

  4. IV

    On site

    The same onboarding in HX Cloud mode: three steps instead of four, enrolment on the HX Cloud server.

  5. V

    Hand over

    The same handover; program changes reach the register by USB key or through the HX Cloud server.

UniCLOUD · Onboarding a client · Quick guide2 / 10
I

Before the visit

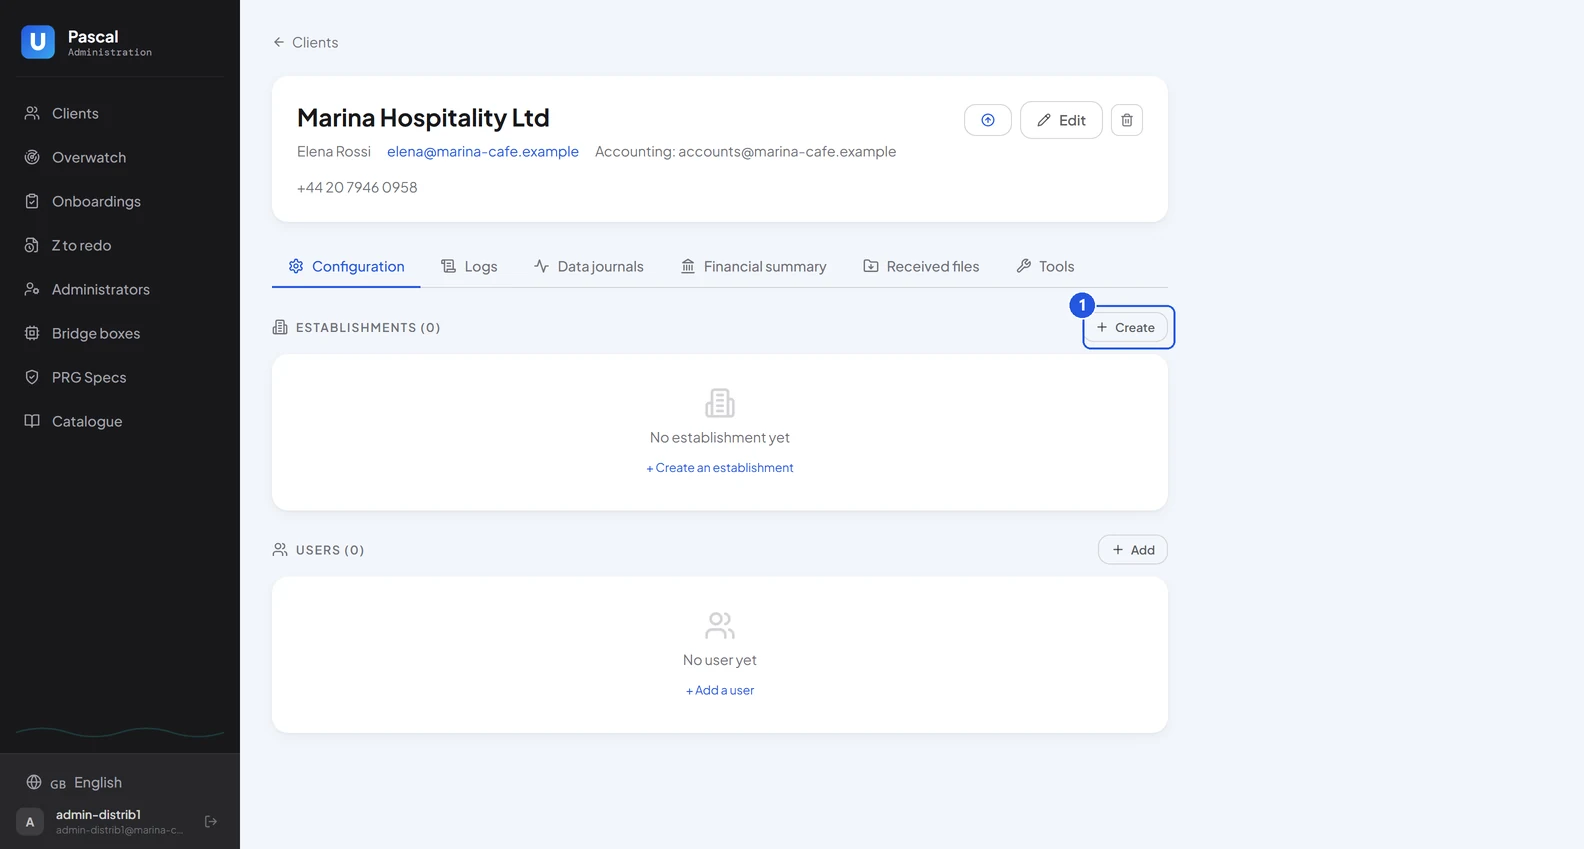
Create the client in your dealer platform

Before going on site, you can already create the client record, one or more establishments and one or more user accounts.

  1. Sign in to your dealer platform
  2. Create the client, or open its record if it already exists
  3. Add an establishment
  4. Create credentials for the client if they do not have any yet
Click by click: appendix A1 to A4 ↗
Client record of the dealer platform, with its Establishments and Users sections
UniCLOUD · Onboarding a client · Quick guide3 / 10
IV

On site

Start the onboarding

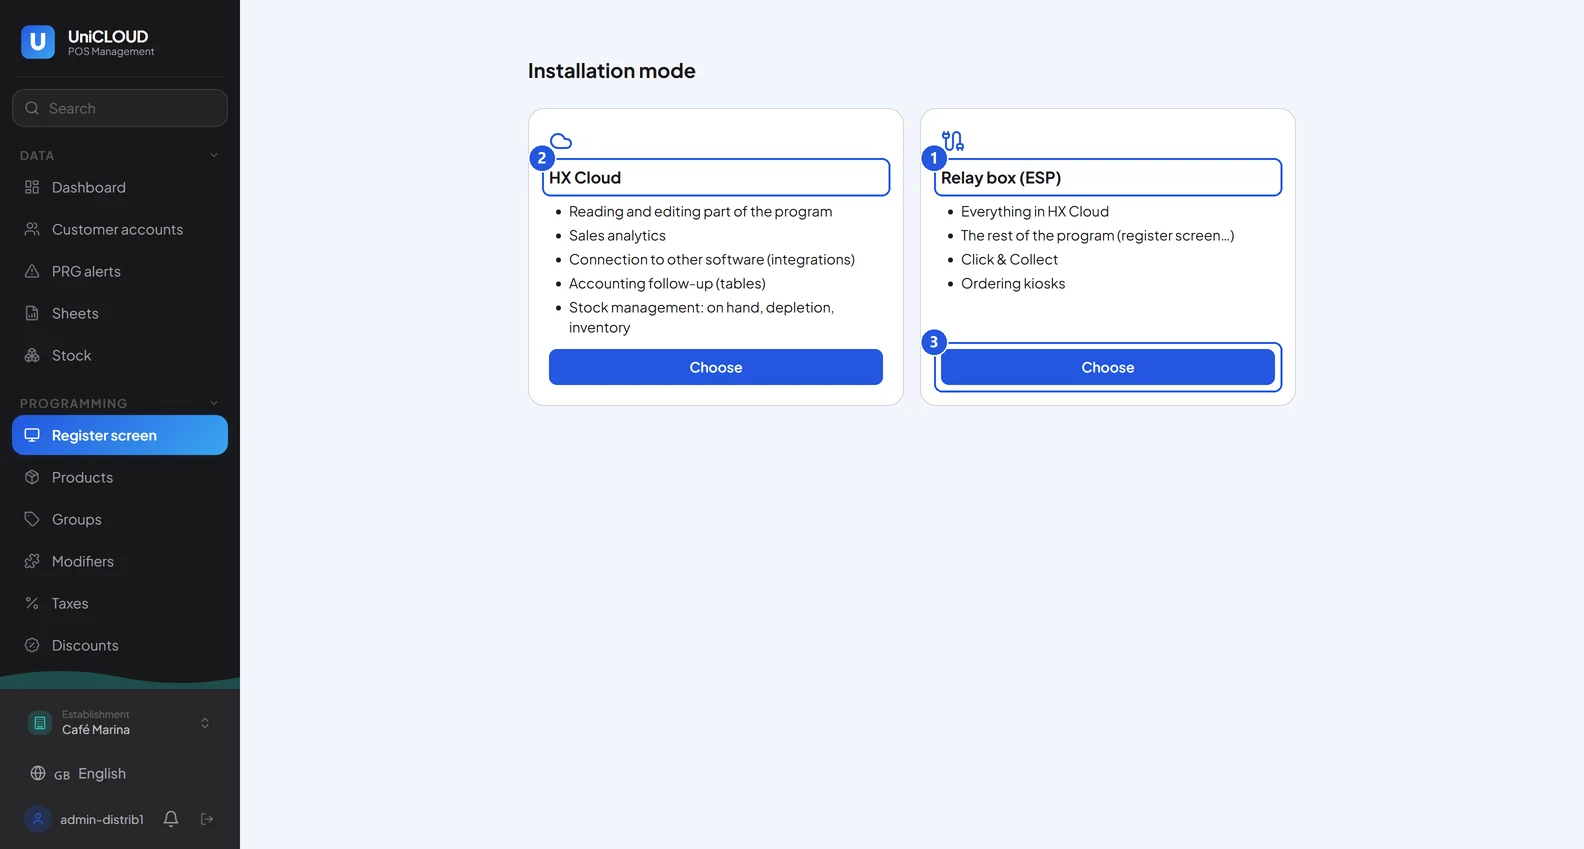
To onboard a client, sign in to the admin platform, the one your clients will use, with your administrator credentials. The onboarding instructions are under the «Register screen» tab.

  1. Sign in with your credentials
  2. Select the establishment
  3. Open the «Register screen» tab
  4. Choose the installation mode
  5. Follow the steps on screen
Click by click: appendix B1 and B2 ↗
Installation mode of the onboarding
UniCLOUD · Onboarding a client · Quick guide4 / 10
IV

On site

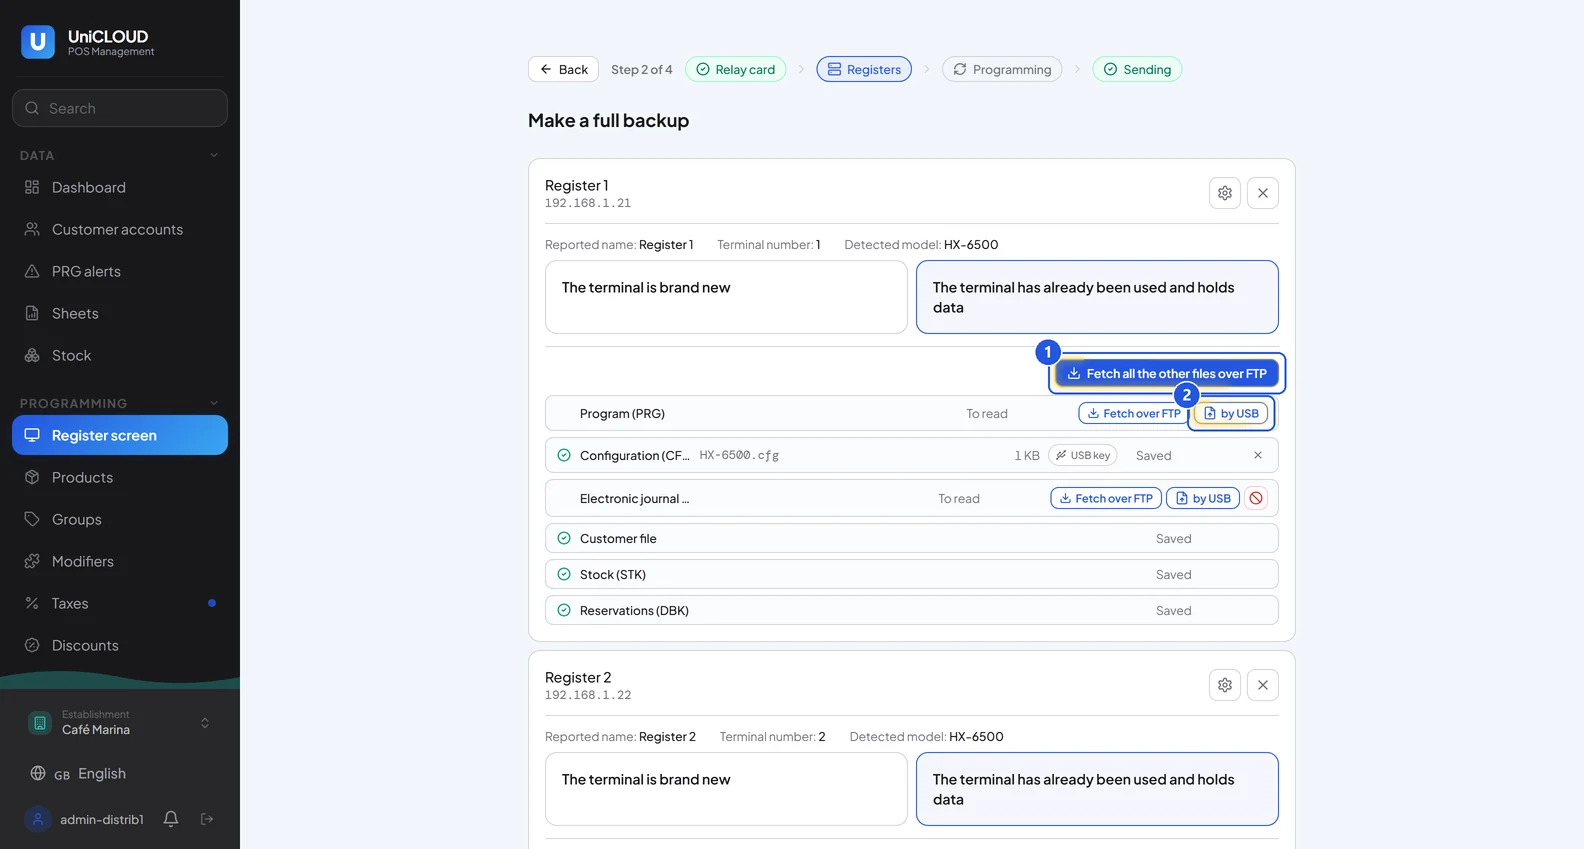
A backup of the register’s files

During the onboarding, by following the steps described on screen, you will be led to back up the register’s files: PRG, CFG and the others.

  1. PRG: the program; CFG: the configuration; plus the journal and the stock if they exist
  2. Kept 30 days: the register can be restored from your dealer platform
Click by click: appendix C1 to C3 ↗
Original snapshot card before fetching
UniCLOUD · Onboarding a client · Quick guide5 / 10
IV

On site

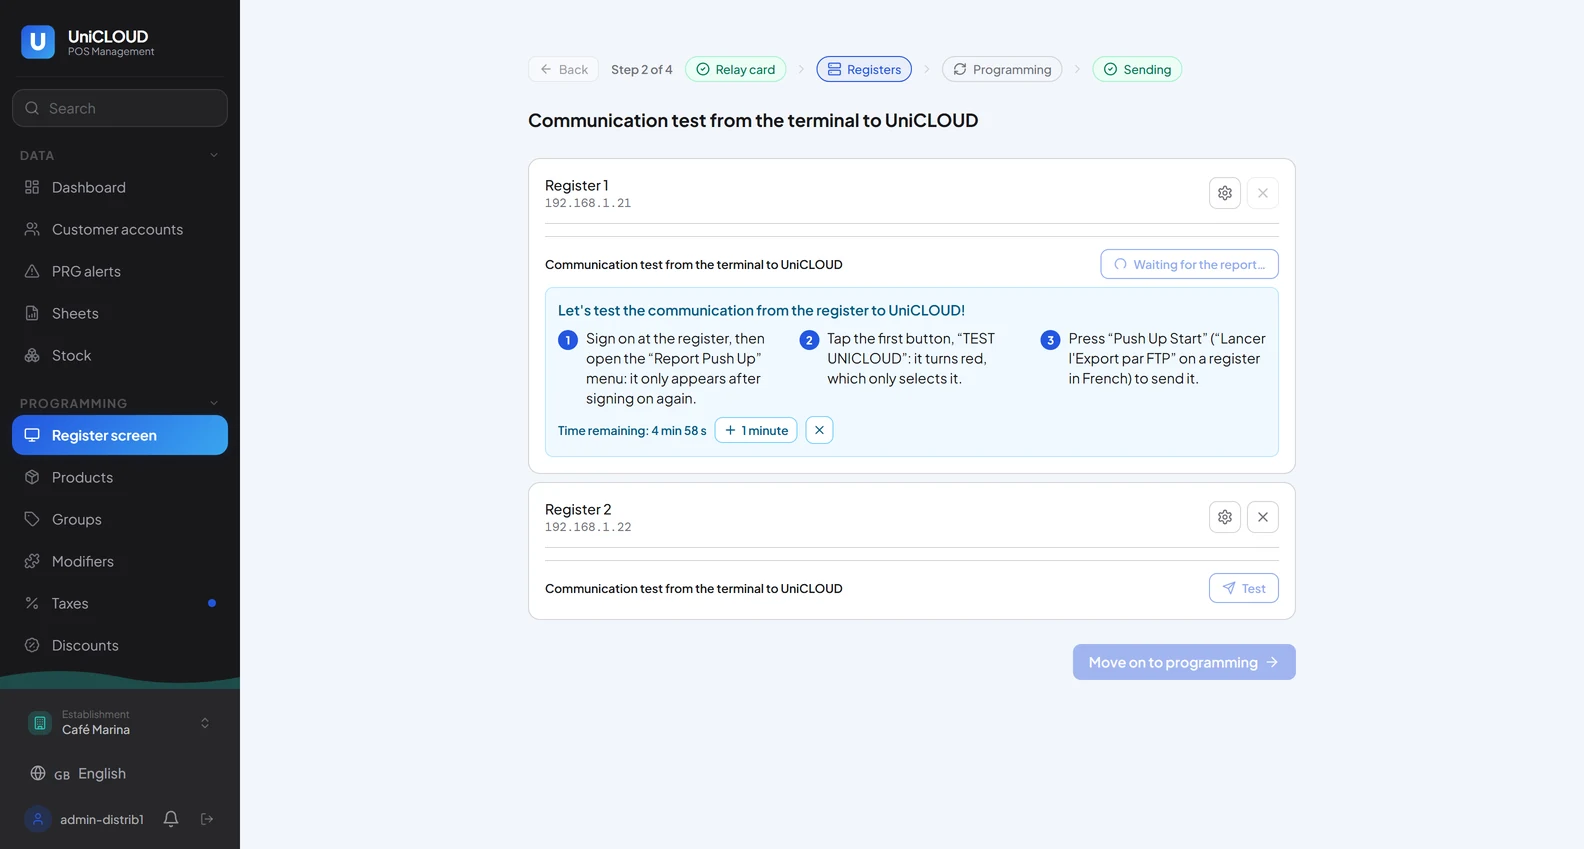
Communication test

Later in the onboarding, a communication test is run: UniCLOUD prepares a test report on the register and waits for it.

  1. On the register: «Report Push Up», «TEST UNICLOUD», «Push Up Start»
  2. «Communication successful»: the register’s reports will reach UniCLOUD every day
Click by click: appendix C4 ↗
Communication test waiting for the register’s report
UniCLOUD · Onboarding a client · Quick guide6 / 10
IV

On site

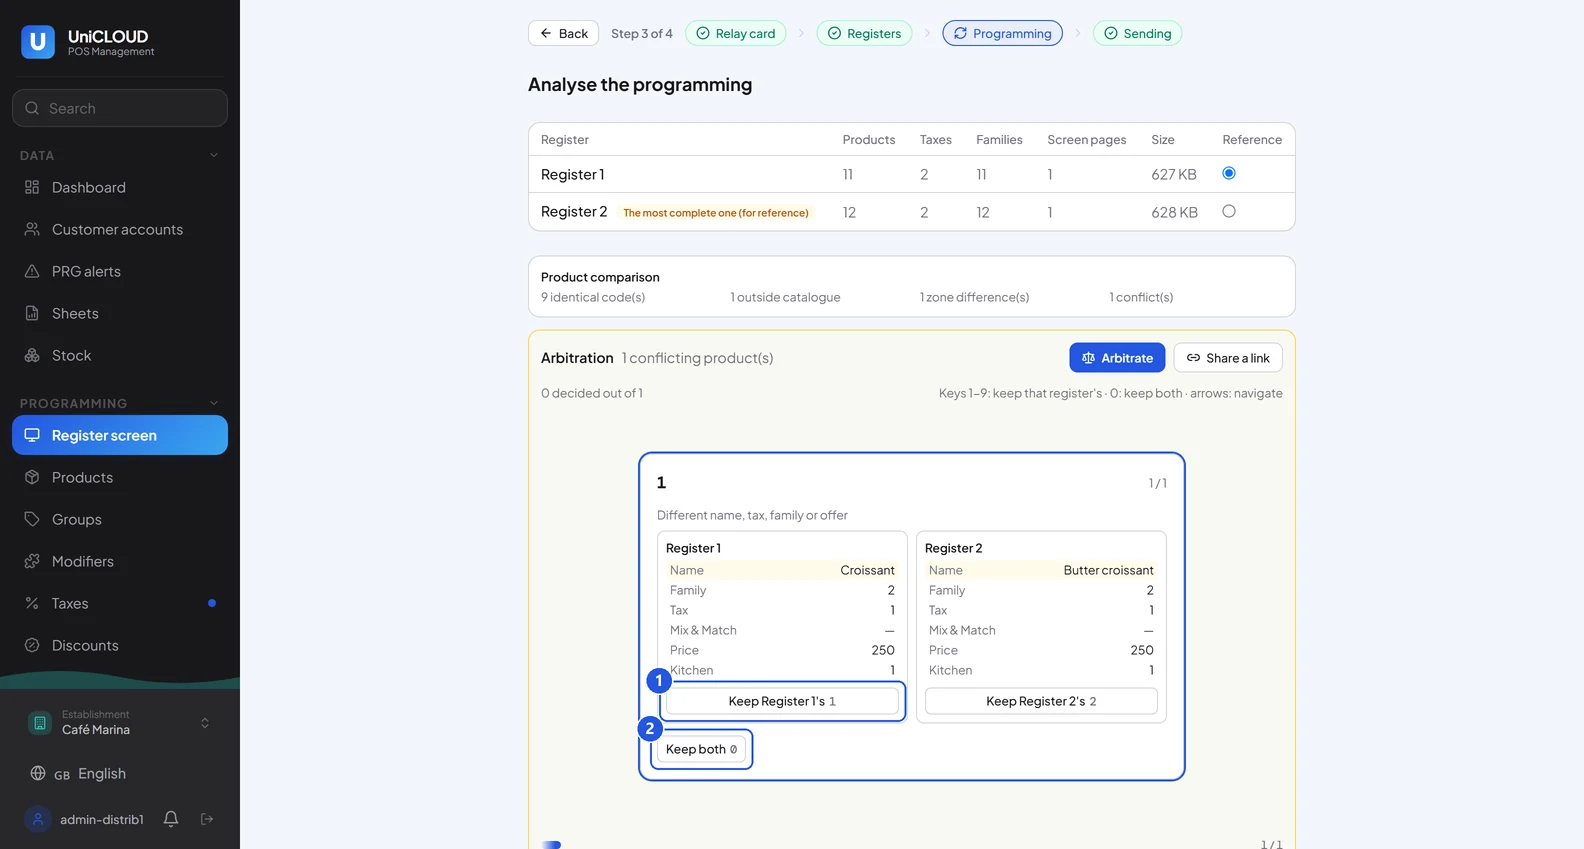
Several registers: decisions to take

Later in the onboarding, if the establishment has several registers and their programs conflict (for example PLU 000000000000000001 exists on both registers with a different name), you will be asked to make decisions, which you can leave to the client.

  1. «Keep Register 1’s», «Keep Register 2’s» or «Keep both»
  2. «Share a link»: the merchant decides from any device
Click by click: appendix C5 to C7 ↗
Arbitration card: the same PLU code with two names
UniCLOUD · Onboarding a client · Quick guide7 / 10
V

Hand over

Hand over

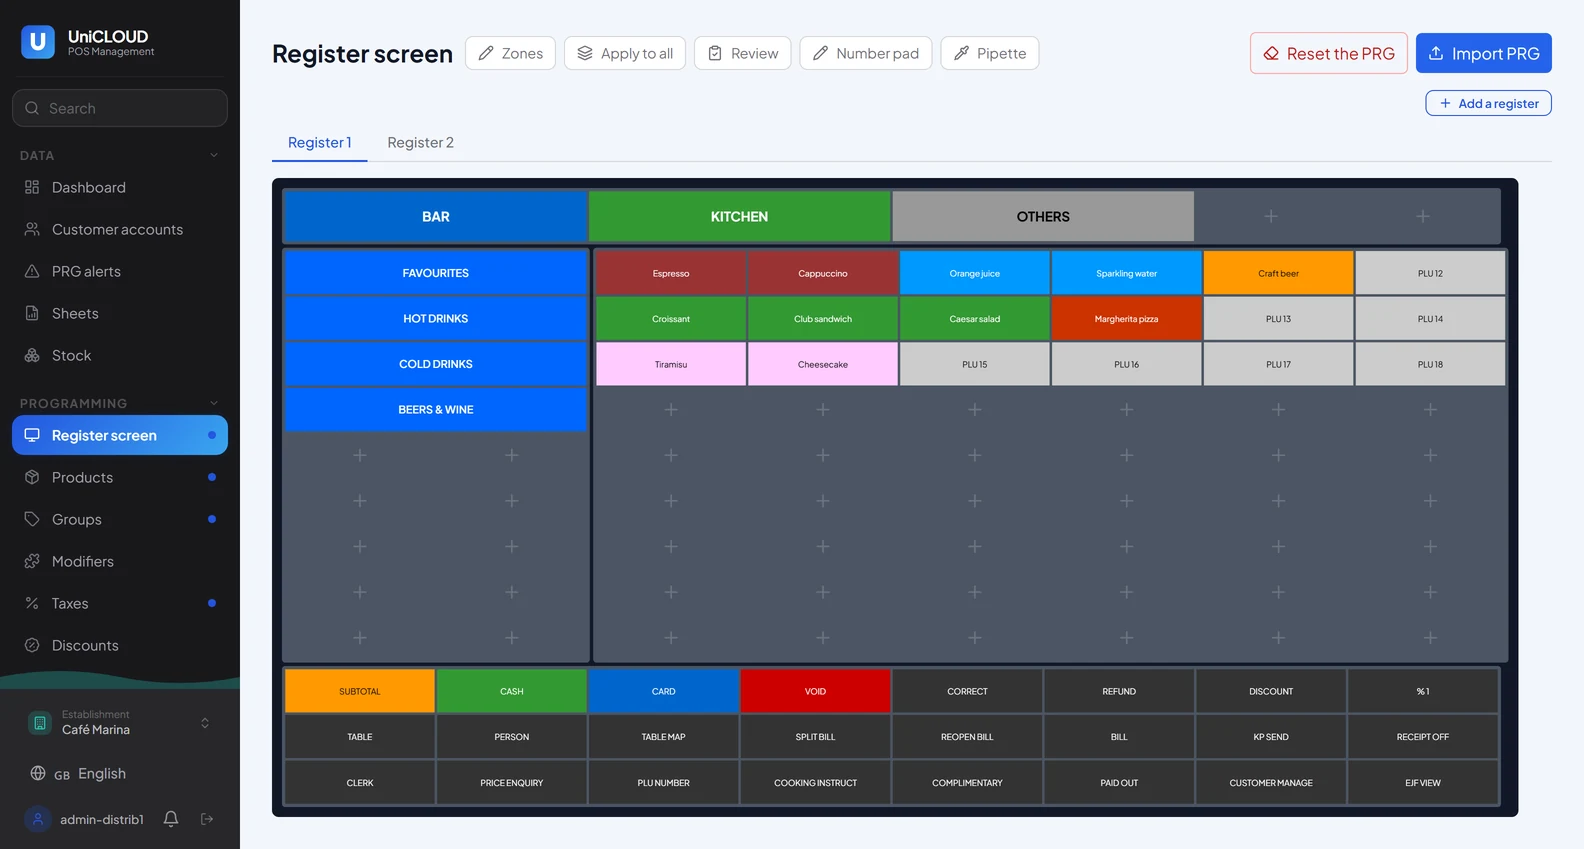
Give the merchant their credentials and show them how to sign in and edit products on the «Register screen»: changes are sent to the registers from here, through the box. The dashboard fills with the first end-of-day (Z) report. To assist them remotely, press the eye icon on the user’s line in your dealer platform: you see UniCLOUD as they do.

  1. The Uniwell register screen as it is: page groups, categories, product keys and function keys
  2. One tab per register
Click by click: appendix D1 to D3 ↗
Register screen after the onboarding: page groups, categories, product keys and function keys
UniCLOUD · Onboarding a client · Quick guide8 / 10
IV

HX Cloud · On site

Without a box: HX Cloud

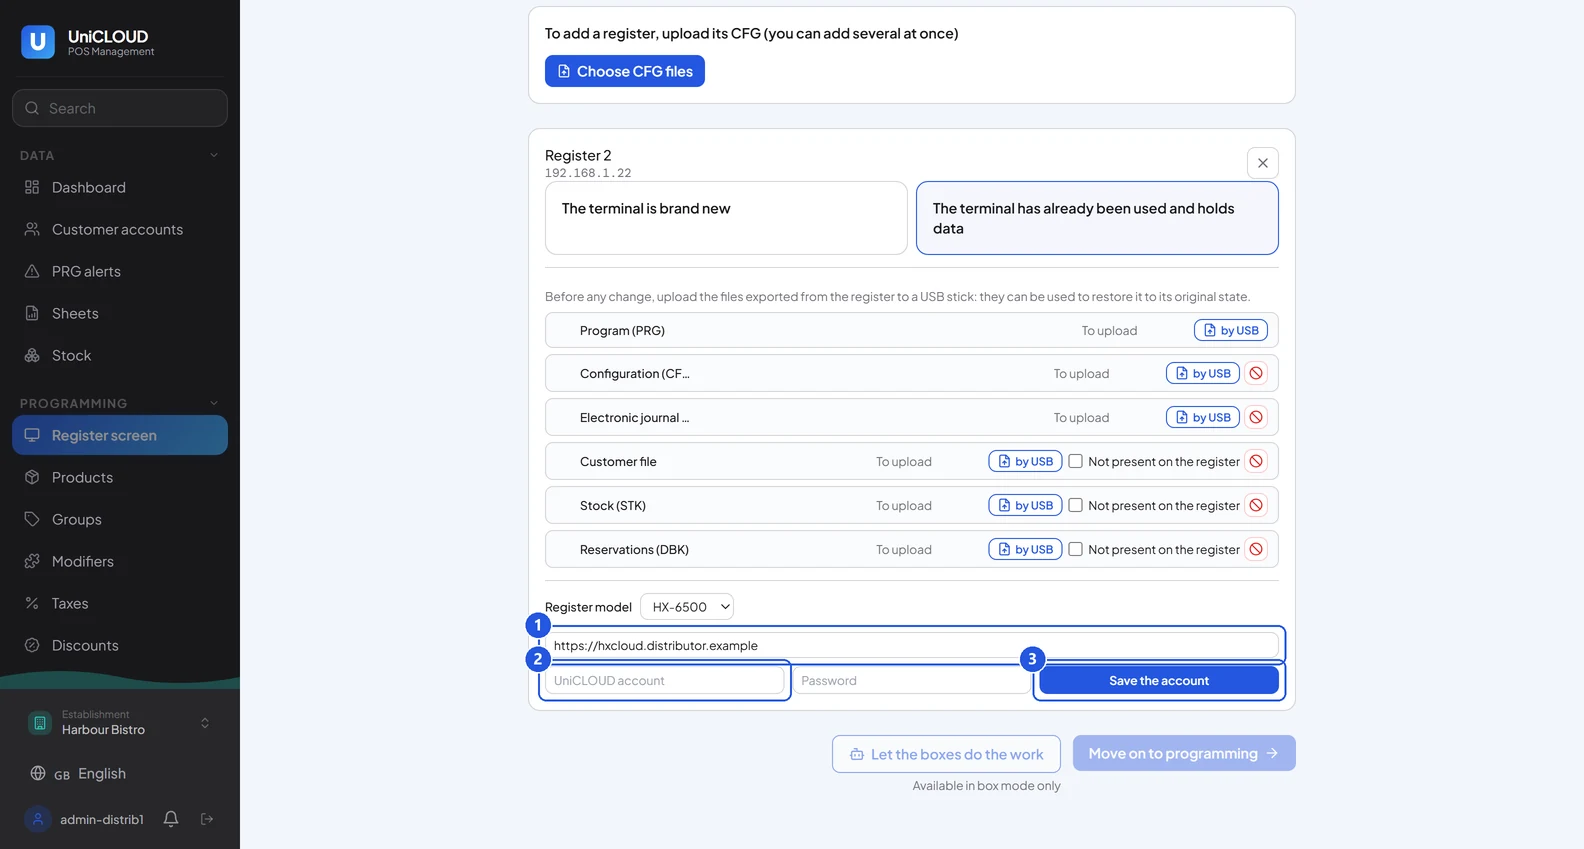
Same onboarding, three steps instead of four. Choose «HX Cloud», declare each register by its CFG file from the USB key (the onboarding upgrades it to firmware 7.00 if needed) and press «Save the account»: the register is enrolled on the HX Cloud server. The final send prepares the files for the key.
  1. Server address prefilled
  2. «UniCLOUD account»
  3. «Save the account»
Click by click: appendix F1 and F2 ↗
HX Cloud enrolment form
UniCLOUD · Onboarding a client · Quick guide9 / 10

Ready for the first client

Your dealer platform, the onboarding, the handover.

Appendix

Every task click by click, with a table of contents: the Appendix, a separate document.

../../appendix/en/index.html

UniCLOUD · Onboarding a client · Quick guide10 / 10